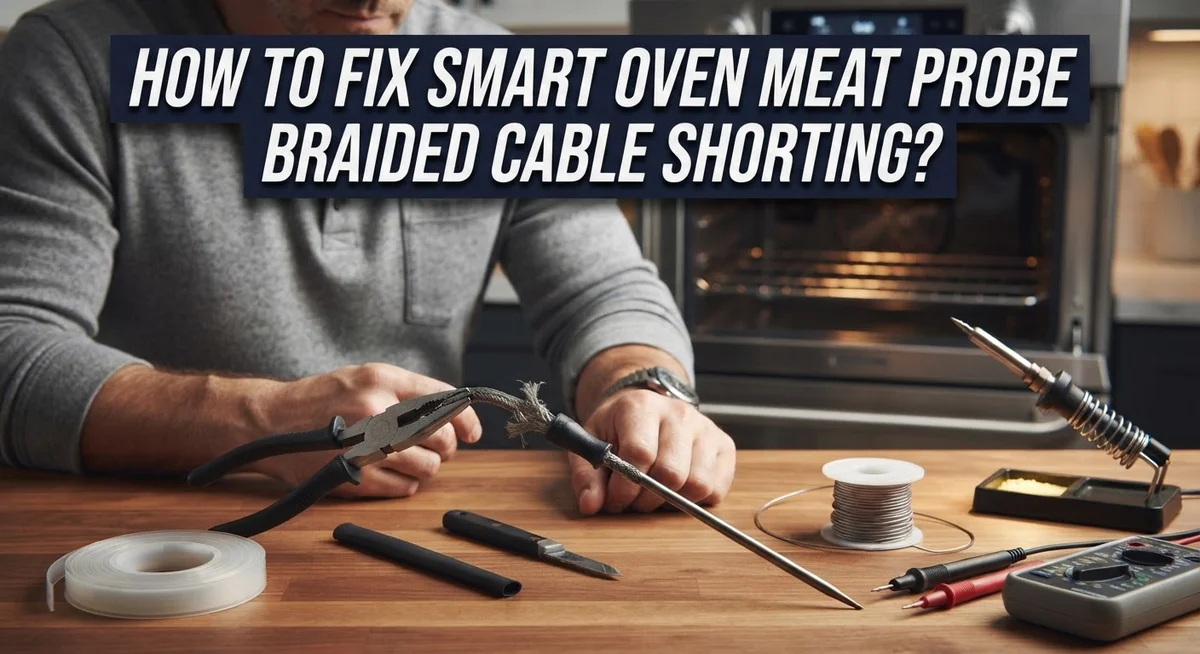
How To Fix Smart Oven Meat Probe Braided Cable Shorting?
Your smart oven meat probe should make cooking easier. But sometimes the braided cable starts shorting out. This causes annoying error prompts and readings you cannot trust.
This problem usually points to a thermistor issue inside the probe. The thermistor is the small sensor that reads meat temperature. When the braided cable shorts, it sends false signals to your oven.
You might see a “remove probe” message even when everything looks fine. Or the temperature reading jumps around for no reason. These signs mean it is time to troubleshoot.
In a Nutshell
- Check the thermistor first. Most shorting problems come from a damaged temperature sensor inside the probe. A multimeter set to resistance mode can confirm this quickly.
- Insert the probe correctly. Place it in the thickest part of the meat. Avoid touching bone, since this causes false readings.
- Plug in before cooking. Always connect the probe to the oven port before you start. This prevents connection errors mid cook.
- Try a power cycle. Turn off the breaker for five minutes, then restart your oven. This often clears temporary glitches.
- Watch for repeat errors. If the “remove probe” message keeps appearing after a reboot, the sensor likely has permanent damage.
- Avoid common mistakes. Don’t let the probe touch bone. Make sure the connector is fully inserted every time.
Understanding the Braided Cable and Thermistor Function
Your smart oven meat probe contains two main parts that work together: the braided cable and the thermistor. Understanding how these components function helps you diagnose shorting problems quickly.
The braided cable is the protective outer layer made of woven metal strands. This cable shields the inner wires from heat and physical damage. When you see “braided,” think of it like a metal sweater wrapped around delicate wires inside. The braiding allows electrical signals to travel from the thermistor to your oven’s display panel.
The thermistor is the actual temperature sensor. It sits at the probe’s tip and measures meat temperature. As heat increases, the thermistor’s electrical resistance changes. Your oven reads these resistance changes and shows the current temperature on your screen.
When shorting occurs, the braided cable loses its ability to protect the inner wires. Moisture, bent connectors, or frayed strands can cause the inner wires to touch each other. This creates an electrical short circuit. Your oven then receives confused signals instead of accurate temperature data.
Here’s how the system works normally: You insert the probe into meat. The thermistor detects heat. It sends an electrical signal through the braided cable. Your oven receives the signal and displays the temperature.
When shorting happens, this signal path breaks. Your oven cannot read the thermistor properly. You might see error messages or false temperature readings. Sometimes the probe stops responding entirely.
The braided cable design matters because it prevents outside electrical interference. Without proper braiding, radio waves and other signals could interfere with your temperature reading. The cable also keeps the delicate sensor wires safe from the oven’s intense heat.
Knowing these basics helps you understand why testing the thermistor with a multimeter matters. The multimeter measures electrical resistance. A damaged thermistor shows incorrect resistance readings. This tells you whether the problem is the sensor itself or the cable connection.
Signs of a Shorting Meat Probe Cable
Your smart oven will show you clear warning signs when the meat probe cable starts shorting. Learning to spot these signs helps you catch the problem early before it ruins a meal.
The most obvious sign is an error message on your oven display. You might see “probe error,” “remove probe,” or “sensor failure” even when the probe looks perfectly fine. This message appears because the thermistor cannot send accurate temperature readings to your oven’s control board.
Another common sign is inaccurate temperature readings. Your oven might show the meat is done cooking when it is still raw inside. Or it might say the meat needs more time when it is already overcooked. These false readings happen because the shorting cable interrupts the signal between the thermistor and your oven.
You may also notice the probe stops responding entirely. You insert it into the meat, set your target temperature, but nothing happens. The oven ignores the probe completely. This total failure usually means the cable has a serious short circuit.
Some ovens display fluctuating temperature numbers on the screen. The reading jumps from 120°F to 180°F to 150°F in just seconds. This erratic behavior shows the cable cannot maintain a steady electrical connection.
Pay attention to physical warning signs too. Look for visible damage on the cable itself like cracks, burns, or exposed wires. Feel the cable for unusual heat. Smell near the probe connector for a burnt or plastic odor.
If you see these signs during cooking, stop immediately. Remove the probe and let it cool. Do not force it or bend it further. These warning signs tell you the thermistor is failing and needs attention before your next cooking session.
Proper Probe Insertion and Setup Before Cooking
Proper probe insertion makes a huge difference in avoiding cable shorts and getting accurate readings. Start by choosing the right location on your meat. Insert the probe into the thickest part of the meat where you want to measure temperature. This spot should be away from any bones, fat pockets, or the bottom of the pan.
Why location matters: Bones conduct heat differently than meat. If your probe touches bone, it reads the wrong temperature. This can trigger false error messages that look like cable shorting problems. The probe needs direct contact with actual meat tissue.
Push the probe in slowly until it reaches the center of that thick section. The tip should be fully surrounded by meat, not sticking out the other side. Most probes have a marked insertion depth line on the shaft. Stop when this line reaches the meat surface.
Next, check the connector before plugging in. Look at where the probe cable connects to your oven. Make sure the connector isn’t bent, cracked, or corroded. Gently push it in until you hear or feel a click. A loose connection causes many false “shorting” errors.
Wait a few seconds after inserting the probe. Let the thermistor stabilize and send its first reading to the display. This initial delay is normal and prevents startup errors.
Set your target temperature in the 100 to 200 degree Fahrenheit range, depending on your meat type. Enter this number into your oven before you start cooking. This tells the oven what reading to expect from your probe.
Avoid these common mistakes: Don’t wiggle the probe around once it’s inserted. Movement can damage the internal wires and cause actual shorts. Never insert the probe at an angle. Always push straight in. Don’t force the connector into the oven port. These simple steps prevent most cable shorting problems before cooking even begins.
Step-by-Step: Testing the Thermistor with a Multimeter
A multimeter is a simple tool that measures electrical resistance. This test tells you if your thermistor is working properly or if it has failed.
Here’s what you need to do first. Turn off your smart oven completely. Unplug the meat probe from the oven connector. You need the probe disconnected to test it safely.
Set your multimeter to the resistance mode. This setting is usually marked with an ohm symbol that looks like a horseshoe. The resistance mode measures how much the thermistor resists electrical flow.
Now test the thermistor itself. Touch one multimeter probe to each end of the thermistor. The thermistor is the small metal tip at the end of your meat probe cable. Hold the contacts steady for a few seconds.
A healthy thermistor shows a resistance reading between 1,000 and 10,000 ohms. The exact number depends on your specific oven model. Check your oven’s manual for the correct resistance range for your probe.
What if the reading is wrong? If the multimeter shows zero ohms, your thermistor has a short circuit. If it shows infinite resistance or no reading at all, the thermistor is open circuit. Both situations mean the thermistor has failed and needs replacement.
Test the braided cable too. Touch your multimeter probes to different points along the braided cable. A working cable should show consistent resistance. If you find spots with zero or infinite resistance, the braiding is damaged.
Important safety step. Always keep the oven unplugged while testing. Never test with power running through the probe. This protects you from electrical shock.
Write down your multimeter readings. Compare them to your oven manual’s specifications. This information helps you decide if replacement is necessary or if the issue is something else entirely.
Power Cycling Your Oven to Clear Probe Errors
Power cycling your smart oven is often the first step to clear temporary probe errors. This simple restart can fix glitches that make your oven think the probe is shorting when it actually isn’t.
Here’s what you need to do. Locate your oven’s circuit breaker in your home’s electrical panel. Look for the breaker labeled for your kitchen or oven specifically. Switch it to the OFF position completely.
Wait a full 5 minutes before turning it back on. This waiting period allows your oven’s internal systems to fully discharge and reset. During this time, any temporary error codes stored in the oven’s memory will clear out.
After 5 minutes, switch the breaker back to ON. Your oven will restart and go through its normal startup sequence. You may hear beeping sounds or see lights flash as the system boots up again.
Once the oven finishes restarting, check if the probe error message is gone. Try inserting your meat probe again and setting a target temperature. If the error clears and your oven accepts the probe, the issue was likely just a temporary glitch.
However, if the same error returns immediately after power cycling, this indicates a deeper problem. A persistent error after reboot suggests actual hardware failure rather than a software issue. The thermistor inside your probe may have a permanent short circuit.
In this case, power cycling alone won’t solve your problem. You’ll need to move forward with testing the thermistor using a multimeter or consider probe replacement options.
Power cycling works best when the error appears randomly or happens just once. If your oven shows the probe error every single time you use it, the braided cable or thermistor likely needs replacement rather than just a restart.
Common Mistakes That Cause False Probe Readings
Probe placement mistakes cause most false readings in smart ovens. Understanding what goes wrong helps you avoid these issues before they start.
Touching bone with the probe tip creates the biggest problem. Bone conducts heat at a different rate than meat. Your thermistor reads the bone’s temperature instead of the meat’s actual doneness. This mismatch triggers false high readings or sudden error messages. Always aim for the thickest meat section away from any bones.
Inserting the probe at an angle instead of straight in causes braided cable strain. The connector bends awkwardly inside the oven wall. This bending creates micro fractures in the internal wires. Over time, these tiny breaks lead to short circuits. Push the probe straight and level into your meat.
Wiggling or moving the probe during cooking damages the cable connection. Each movement flexes the braided sheath and internal wires. The thermistor loses contact with the oven’s receiver. Your display shows error codes or jumps between wildly different temperatures. Insert once and leave it alone until cooking finishes.
Inserting the probe only halfway leaves the connector loose in the oven socket. Loose connections create resistance problems. Heat and moisture enter the connection point. This causes temporary shorts that trigger false “remove probe” messages. Push the connector all the way in until you hear a soft click.
Inserting a cold probe into hot meat causes thermal shock to the thermistor. The sudden temperature change stresses the sensor. The resistance reading becomes unstable. Your oven displays conflicting temperature readings. Let the probe reach room temperature before inserting it into preheated meat.
Using the probe before fully charging drains its battery during cooking. Low power causes weak signals to the thermistor. The oven interprets weak signals as cable shorts. Charge your probe completely before each use. These simple placement habits prevent most false readings and cable shorting issues.
Troubleshooting Persistent Probe Errors and Hardware Failure
When your smart oven shows persistent probe errors even after a power cycle, you’re likely facing hardware failure. This section helps you understand what’s happening and what your next steps should be.
Persistent errors mean the problem is real. If the same error message returns immediately after you restart your oven, the issue isn’t temporary. Your thermistor or braided cable has likely suffered permanent damage. A one time error that disappears is different from an error that keeps coming back.
The braided cable inside your probe carries electrical signals from the thermistor to your oven. When this cable shorts, it sends confusing signals to your oven’s computer. Your oven responds by showing error messages or refusing to accept temperature readings.
Test your thermistor resistance first. Use a multimeter set to resistance mode. Touch the probes to each end of the thermistor. A reading between 1,000 and 10,000 ohms means your thermistor is healthy. A reading of zero ohms indicates a short circuit has occurred.
Check the braided cable itself next. Run your multimeter along different points of the cable. Look for spots where the resistance drops to zero. These spots show where the cable has shorted out.
If your multimeter confirms a short circuit, replacement is your only real solution. Hardware failure cannot be repaired by cleaning, adjusting, or resetting your oven. The damaged components must be replaced with new ones.
Document the error messages you see. Write down exactly what your oven displays. Note when the errors happen and what temperature you were trying to reach. This information helps you explain the problem if you need to contact support or order replacement parts.
Understanding the difference between temporary errors and permanent hardware failure saves you time and frustration.
Final Thoughts
Fixing a shorted meat probe cable does not need to be complicated. Start with the simple steps first. Power cycle your oven and check your probe placement before assuming the worst.
Most probe errors come from user mistakes, not hardware failure. Bone contact, shallow insertion, and cable strain cause a large share of these problems. Fixing these habits often solves the issue right away.
When basic fixes do not work, testing becomes your next move. A multimeter tells you the truth about your thermistor and cable condition. This step removes guesswork from your troubleshooting process.
Persistent errors after a proper power cycle usually mean real hardware damage. Your thermistor or braided cable has likely failed beyond repair. No amount of restarting will fix a broken wire or dead sensor.
Replacement becomes necessary at this point. A damaged probe cannot give your oven accurate readings anymore. Cooking with a faulty probe risks undercooked or overcooked meals.
Keep good habits going forward to avoid repeat problems. Insert your probe straight into the thickest part of your meat. Avoid bones and keep the connector fully plugged in during cooking.
Handle your probe gently between uses. Avoid yanking the cable or bending it at sharp angles. Small care habits extend the life of your probe significantly.
Document any error messages you see during testing. This record helps if you contact support or need warranty service. Clear notes make the whole process faster for everyone involved.
Smart oven probes make cooking easier when they work correctly. A little care and quick troubleshooting keep them working longer. When damage does happen, you now know exactly what steps to take next.
Frequently Asked Questions
What does a braided cable short actually mean in my meat probe?
A short circuit happens when the braided cable inside your probe loses its protective layer. The metal strands touch each other or the probe’s internal components. This creates an electrical fault instead of a clean signal path.
Your thermistor (the temperature sensor) sends signals through this braided cable to your oven. When a short occurs, the signal gets blocked or scrambled. Your oven then displays error messages or false temperature readings.
Why does my probe show an error even after I restarted it?
A power cycle clears temporary errors caused by software glitches. You shut off the breaker for 5 minutes, then restart. This resets your oven’s memory.
If the same error returns immediately, you have a hardware problem. The braided cable itself is damaged. Software cannot fix physical damage to the cable or thermistor.
How can I test if my probe cable is actually shorted?
Use a multimeter set to resistance mode. Disconnect your probe from the oven first. Touch the multimeter leads to the probe’s connector pins.
A working probe shows normal resistance readings. A shorted probe shows zero or very low resistance. This confirms the braided cable has failed and needs replacement.
Can I repair a shorted braided cable myself?
The braided cable sits deep inside your probe’s housing. Accessing it requires disassembly that may break other internal parts. Most people cannot safely open and reseal a probe without damaging it further.
Replacement is the practical solution. A new probe gives you a fully functional unit with a proper braided cable and working thermistor.
What’s the right way to insert my probe to avoid future shorts?
Insert your probe straight into the thickest part of your meat. Avoid bones completely. Push the connector fully into the oven socket until it clicks.
Do not wiggle or move the probe during cooking. Let it sit still in one position. Gentle handling protects the braided cable from strain and damage.

Hi, I’m Rue Hessel, the founder and voice behind TheGenTool. I’m a passionate tech enthusiast who loves exploring the latest gadgets, smart devices, and electronics that shape our everyday lives. Through my website, I share honest, hands-on reviews of trending Amazon products to help you make smarter and more confident buying decisions.