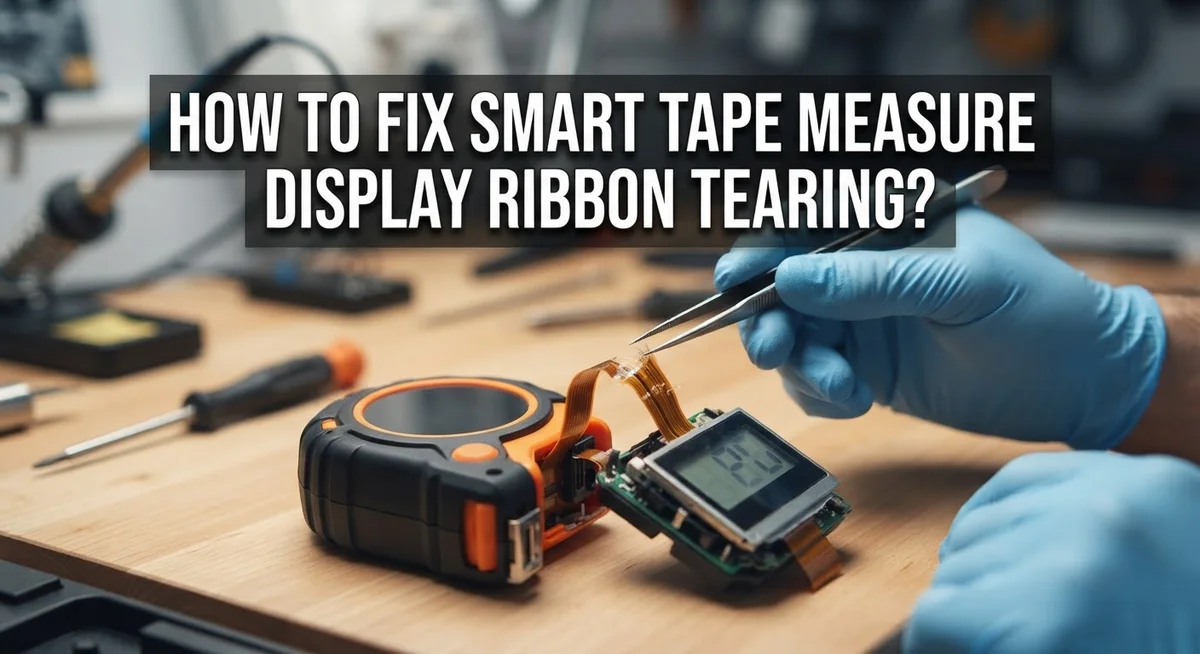
How To Fix Smart Tape Measure Display Ribbon Tearing?
Your smart tape measure should make quick work of every project. But then you notice it. A small tear on the display ribbon. Suddenly your readings look off or disappear completely.
This problem happens more often than you think. Many users see ribbon damage within just two months of regular use. It affects both standard tape measures and smart Bluetooth enabled versions alike.
The good news? You can fix this issue. Most display ribbon tearing happens because of simple mistakes. Things like incorrect handling or forcing the ribbon can cause real damage over time.
This guide walks you through everything you need to know. We will cover why ribbon tearing happens in the first place. You will learn the common mistakes that lead to this frustrating problem.
In a Nutshell
- Tearing often happens early. Many users see this problem within just two months of use. It affects both regular and smart tape measures with Bluetooth features.
- Bad habits cause most damage. Forcing the ribbon out or letting it snap back too fast puts stress on the material. This stress leads to cracks and tears over time.
- Check before you blame the hook. A torn ribbon can look like a hook problem. Always inspect the ribbon first before assuming other parts are broken.
- Technique matters more than you think. Using the wrong method for inside versus outside measurements can bend or twist the ribbon. This small mistake adds up fast.
- Smart tape measures need extra care. These tools connect through an app via Bluetooth. Setup steps differ slightly from standard tape measures.
- Repairs are possible but need patience. You may need to open the case and check internal parts. Sometimes replacing the damaged section is the only fix.
Understanding Display Ribbon Tearing: What Causes It
Display ribbon tearing happens when the internal measurement tape inside your smart tape measure gets damaged or torn. This affects the device’s ability to display accurate readings on your screen.
The ribbon itself is a thin, flexible material that winds around a spool inside the case. When you extend and retract the tape, this ribbon moves constantly. Over time or with improper use, it can develop tears or fraying.
Mechanical stress causes most ribbon damage. Forcing the tape out too quickly puts extreme tension on the material. Letting it snap back forcefully creates shock that can split the ribbon. Even gentle use can cause problems if the internal spool has defects or rough edges that catch the ribbon.
Poor measurement technique also damages ribbons. When you use the wrong method for inside measurements, you bend the tape at odd angles. This twisting motion stresses the ribbon more than normal extension and retraction. Outside measurements done carelessly can kink the tape, creating weak points that eventually tear.
Environmental factors play a role too. Temperature changes can make the ribbon material brittle or less flexible. Dust and debris inside the case can get caught on the ribbon, causing small tears that grow larger with use.
Blade wear creates another common problem. The blade that locks the tape in place can develop rough spots. These spots catch and fray the ribbon edges over time. A damaged blade may not retract smoothly, forcing the ribbon to bend at sharp angles.
Understanding these causes helps you prevent damage. You can also recognize what went wrong if your ribbon already has tears. This knowledge makes repairs easier and helps you use your smart tape measure correctly moving forward.
Signs Your Smart Tape Measure Has a Torn Display Ribbon
Your smart tape measure sends you warning signs before the display ribbon completely fails. Learning to spot these signals helps you catch problems early and prevent bigger damage.
Visible cracks or splits appear on the ribbon surface itself. You might see these when you pull the tape out slowly. Small tears often grow into larger ones if you keep using the measure without fixing it.
The ribbon doesn’t retract smoothly anymore. Instead of sliding back into the case with ease, it catches or bunches up. This jerky movement means the ribbon has started to fray or separate from its backing.
Measurement readings become inconsistent on your smart app. The Bluetooth connection shows different numbers each time you measure the same distance. This happens because the torn ribbon no longer aligns properly with the internal sensors.
You hear clicking or grinding sounds when extending or retracting the tape. These noises indicate the damaged ribbon is rubbing against internal parts. The friction creates resistance that didn’t exist before.
The ribbon feels stiff or brittle when you touch it. A healthy ribbon flexes smoothly. A damaged one becomes less flexible and more prone to breaking further.
Visible fraying appears at the ribbon edges. The material starts to separate into individual strands. This usually happens near the case opening where the ribbon enters and exits.
The tape measure feels heavier or unbalanced in your hand. Internal damage can shift the weight distribution inside the case.
Pay attention to these signs. Early detection means simpler repairs and longer tool life. Stop using the measure if you notice multiple warning signs together.
Tools and Materials Needed Before You Start Repairs
Before you start fixing your smart tape measure, gather the right tools and materials. Having everything ready makes the repair process smoother and prevents frustration halfway through.
You’ll need a small Phillips head screwdriver to open the case. Most smart tape measures use Phillips screws rather than flat head ones. A flathead screwdriver helps pry open the case carefully without damaging the plastic edges.
Tweezers are essential for handling small internal parts. The components inside are tiny, and your fingers may be too large to manipulate them safely. Precision tweezers let you move ribbon sections and other delicate pieces without breaking them.
A magnifying glass or small LED flashlight helps you see the damage clearly. Display ribbon tears can be small and easy to miss in dim lighting. Good visibility lets you assess whether repair or replacement is necessary.
Isopropyl alcohol and lint free cloths clean the internal components. Dust and debris accumulate inside the case over time. Clean surfaces help you spot damage and ensure parts move smoothly after repair.
You may need replacement ribbon material or adhesive tape designed for internal repairs. Check what your specific smart tape measure model requires. Some models use special ribbon material that matches the original specifications.
A small container keeps screws and tiny parts organized. Losing a single screw makes reassembly impossible. Label each screw by size and location so you reinstall them correctly.
Finally, keep the instruction manual nearby. Your specific model may have unique internal layouts. The manual shows you exactly where components sit and how they connect together.
Step-by-Step Guide to Fixing a Torn Display Ribbon
Start by powering off your smart tape measure completely. This prevents any electrical issues while you work on the internal components. Set the device on a clean, flat surface with good lighting.
Locate the screws on the back or bottom of the case. Most smart tape measures have 4 to 6 small screws holding the case together. Use your Phillips head screwdriver to remove each screw carefully. Place these screws in a small container so you don’t lose them.
Gently pry open the case using a plastic tool or old credit card. Avoid using metal objects that could damage the internal parts. The case separates into two halves, revealing the internal mechanism and ribbon.
Inspect the ribbon carefully with your magnifying glass or LED flashlight. Look for visible tears, cracks, or fraying along the entire length. Note exactly where the damage occurs on the ribbon.
Clean the area around the damage using isopropyl alcohol and a lint free cloth. Remove any dust or debris that might interfere with your repair. Let the area dry completely before proceeding.
Examine how the ribbon attaches to the spool and case. Most ribbons connect with adhesive or small fasteners. If the tear is small, you can apply special adhesive tape designed for internal repairs directly over the damaged section.
For larger tears, you may need to carefully detach the ribbon from one end. Gently pull the ribbon free from its attachment point. Clean the spool and attachment areas thoroughly before reattaching.
Reattach the ribbon securely, ensuring it winds smoothly around the spool. Test the extension and retraction manually before closing the case. Reassemble the case by reversing your opening steps, replacing all screws firmly but not too tightly.
Reconnecting and Resetting Your Smart Tape Measure After Repair
After you’ve repaired the torn display ribbon in your smart tape measure, you need to reconnect and reset the device properly. This step matters because your smart features won’t work without completing the setup process.
Start by closing the case carefully. Make sure all screws are tight so no dust enters the device. Power on your smart tape measure using the power button or switch. Wait about 10 seconds for the device to fully boot up.
Open the companion app on your smartphone or tablet. Most smart tape measures use Bluetooth to connect with your device. Look for a pairing or connection option in the app menu. Your tape measure should appear as an available device to connect.
Select your smart tape measure from the list of devices. The app will ask you to confirm the pairing. Accept this request on both your smart tape measure and your phone. A successful connection shows a blue light or confirmation message on the device.
Test the measurement function immediately. Extend the tape slowly and check if readings appear correctly on your app. Take several measurements to confirm accuracy. If numbers seem off, you may need to recalibrate the device.
Most apps have a calibration or reset option in settings. Follow the on screen instructions carefully. This process ensures your measurements stay accurate after repair. Calibration typically takes less than two minutes.
If your smart tape measure still won’t connect, restart both devices. Turn off the tape measure and your phone. Wait 30 seconds, then power both back on. Try pairing again through the app.
Once everything connects and reads correctly, your repair is complete. Store your tape measure in a dry place to prevent future ribbon damage.
Common Mistakes to Avoid During the Repair Process
Making mistakes during repair can make your ribbon tearing problem worse. The first error people make is rushing through the process without proper inspection. You must examine the entire ribbon carefully before attempting any fixes. Skipping this step means you might miss additional damage that will cause problems later.
Another common mistake is applying too much force when opening the case. Gentle pressure is essential because aggressive prying can damage internal components or the ribbon itself. Use a plastic tool designed for opening electronics, not metal objects that scratch and dent the housing.
Many people ignore the ribbon’s attachment points. The display ribbon connects to your tape measure in specific ways. If you don’t understand how it’s secured, you’ll struggle to reattach it properly. Take photos before disassembly so you remember the exact configuration.
Improper cleaning causes significant damage. Using regular paper towels or cloth with lint leaves residue on electrical contacts. This residue prevents your smart tape measure from functioning correctly even after ribbon repair. Always use lint free materials and appropriate cleaning solutions.
Reassembling too quickly is another frequent error. After fixing the ribbon, rushing to close the case can pinch or misalign the tape. Make sure the ribbon winds smoothly around the spool before sealing the housing.
Finally, don’t skip the reset process. Some people close their tape measure and assume it works immediately. Your smart device needs proper recalibration through the companion app to function accurately. Test the measurement function slowly and carefully before considering your repair complete.
Preventing Future Ribbon Tearing Through Proper Handling
Proper handling prevents most ribbon damage before it starts. Store your smart tape measure in a dry location away from extreme heat and moisture. These conditions weaken the ribbon material over time and make it more prone to tearing.
When extending the tape, move slowly and deliberately. Rapid jerking motions create unnecessary stress on the internal ribbon. Let the tape glide smoothly rather than yanking it out forcefully. This simple habit cuts your risk of damage significantly.
Avoid forcing the tape back into the case. If you feel resistance, stop and check for obstacles. Something may be blocking the ribbon’s path. Forcing it anyway will cause tears or kinks that are hard to repair.
Keep your tape measure away from sharp objects and rough surfaces. Don’t drop it or place heavy items on top of it. Even small impacts can damage the delicate display ribbon inside.
Use the correct measurement technique for your task. Inside measurements require different handling than outside measurements. Improper technique puts extra strain on the ribbon and the internal mechanism. Always follow the manufacturer’s guidelines for your specific model.
Clean the exterior regularly with a soft, dry cloth. Dirt buildup can affect how smoothly the tape retracts. When the mechanism doesn’t work smoothly, you’re more likely to force it, which damages the ribbon.
Check your tape measure occasionally for signs of wear. Look for fraying edges or stiffness when extending the tape. Catching problems early prevents complete ribbon failure.
Store your smart tape measure in its protective case when not in use. The case shields it from dust, moisture, and accidental damage. These prevention steps keep your device working properly for years.
Troubleshooting Persistent Display Issues After Repair
After you repair the display ribbon, your smart tape measure might still show problems. This section helps you identify and fix lingering issues.
Check the ribbon alignment first. The ribbon must sit perfectly in its track. If it’s slightly off center, readings won’t display correctly. Open the case again and inspect how the ribbon sits. Gently adjust it so it runs straight through the measurement path.
Test the connection between the ribbon and the spool. A loose connection causes intermittent display failures. Press firmly on both attachment points. Make sure nothing blocks the ribbon’s movement along its path.
Look for hidden damage. Small tears hide easily. Run your finger along the entire ribbon length to feel for rough spots or small rips. These tiny imperfections prevent accurate readings even after main repairs.
Verify the case closes completely. If the case doesn’t seal properly, the ribbon experiences constant pressure. This pressure can cause the tear to reopen. Check that all case clips engage fully and the cover sits flush.
Test measurements slowly and carefully. Extend the tape in short increments. Watch the app display for any glitches or delays. If numbers skip or freeze, the ribbon may still have internal damage.
Clean the ribbon gently with a dry cloth. Dust and debris interfere with the display mechanism. Never use water or cleaning liquids near the ribbon.
If problems persist after these checks, the ribbon may need replacement. The internal mechanism might also have damage beyond the visible tear. Consider whether the tape measure is worth repairing or if replacement makes more sense for your needs.
Final Thoughts
Fixing a torn display ribbon takes patience. You don’t need to be an expert to handle this repair. Careful steps make all the difference.
Small tears often lead to bigger problems if you ignore them. Check your tape measure regularly. Catching damage early saves you time and stress.
Remember that both standard and smart tape measures face this issue. Bluetooth models add extra steps for app setup. But the core ribbon repair process stays similar across devices.
Patience matters more than speed during this process. Rushing through case removal or ribbon placement causes new damage. Take breaks if you feel frustrated.
Your hands should move slowly when handling the ribbon. This thin strip tears easily under pressure. Treat it like a delicate part, because it is one.
Good habits protect your device long term. Store it properly. Handle it gently. Avoid rough surfaces and sudden drops.
Regular maintenance beats frequent repairs. A few minutes of care each week keeps your tape measure working well. This simple habit extends its lifespan significantly.
If your repair doesn’t fix the display, don’t panic. Sometimes the damage runs deeper than expected. A replacement part might solve what a repair cannot.
Trust your instincts during troubleshooting. You know your device better after going through this process. Use that knowledge for future issues too.
Every repair teaches you something new. You now understand your tape measure’s internal parts better. This knowledge helps you spot problems faster next time.
Stay confident with future repairs. You’ve already learned the basics here. Apply these same principles whenever ribbon issues appear again.
Frequently Asked Questions
Why does my smart tape measure display ribbon tear so easily?
Display ribbons tear because they experience constant mechanical stress. Every time you extend and retract the tape, the ribbon flexes. Forcing the tape back into the case or extending it too quickly puts extra pressure on the delicate ribbon material.
Even normal use within two months can cause tearing. The ribbon connects sensitive electronic components, so it’s more fragile than standard tape measure ribbons. Environmental factors like heat and moisture also weaken the material over time.
Can I repair a torn display ribbon myself?
Yes, you can repair minor tears. First, open the tape measure case carefully. Locate the torn section of the ribbon. If the tear is small, you may be able to realign it in its track without replacement.
For larger tears, you’ll need to replace the ribbon section. This requires removing the ribbon from its attachment points and installing a new one. The process demands patience and steady hands. After repair, test the connection through your device’s app to ensure the Bluetooth link works properly.
What’s the difference between display ribbon damage and regular tape damage?
Display ribbons carry electronic signals to your smart device. Regular tape measures only have physical markings. When a display ribbon tears, you lose measurement data transmission, not just visual accuracy.
A torn regular tape still functions for basic measurements. A torn display ribbon may stop sending data to your app entirely. This makes display ribbon damage more serious for smart tape measures.
How do I know if my ribbon needs replacement versus simple repair?
Inspect the damage closely. Small tears (less than half an inch) often respond to realignment. Larger tears require full ribbon replacement.
Check if the ribbon still transmits data. If your app receives measurements despite visible damage, realignment may work. If the app shows no connection, replacement is necessary. Test measurements slowly after any repair attempt.

Hi, I’m Rue Hessel, the founder and voice behind TheGenTool. I’m a passionate tech enthusiast who loves exploring the latest gadgets, smart devices, and electronics that shape our everyday lives. Through my website, I share honest, hands-on reviews of trending Amazon products to help you make smarter and more confident buying decisions.