How To Fix a Stripped Smart Faucet Handle Set Screw?
Your smart faucet handle won’t budge, and the tiny set screw looks worse every time you try. That little hex screw controls everything. Once it strips, you can’t remove the handle or reach the cartridge inside.
This problem happens more often than you’d think. A loose Allen key, the wrong size tool, or too much force can quickly ruin the screw’s grip.
The good news? You don’t need to call a plumber right away. Many stripped screws can be fixed with tools you already have at home.
In a Nutshell
- Start simple. Try the rubber band trick first. It fills small gaps in the stripped screw and gives your Allen key extra grip.
- Size matters. Grab the next size up hex key. A snug fit often works better than a loose one.
- Epoxy works, but it’s a one time deal. JB Weld can bond your Allen wrench to the screw. Wait a full 24 hours before you try to turn it. You’ll lose that wrench after use.
- Go bigger if needed. Easy outs or drilling the screw completely are solid backup options. These take more skill and care.
- A thin blade can help. Slide it under the screw head for extra leverage in tricky spots.
- Avoid common slip ups. Skip the wrong size tools. Don’t force a screw that’s already stripped. This only makes things worse.
- Clean first, then work slowly. Wipe away grime around the screw before you start. Patience saves your fixture from more damage.
Why Smart Faucet Set Screws Strip in the First Place
Smart faucet set screws strip because the connection between your Allen key and the screw fails. The hex socket inside the screw gets damaged, and your tool loses its grip. This happens fast once it starts.
Over tightening is the main culprit. Many people crank down on the handle escutcheon too hard during installation. The pressure transfers down to the tiny set screw below. The metal walls of the hex socket collapse inward. Your Allen key can no longer bite into the screw properly.
Using the wrong size Allen key causes stripping too. If your key is slightly too small, it rocks inside the socket instead of gripping firmly. Each turn damages the walls a little more. Eventually, the screw spins freely without turning.
Corrosion and mineral buildup create another problem. Hard water deposits and rust accumulate around the screw. You apply more force to turn it, thinking something is stuck. The extra pressure damages the hex socket walls.
Repeated attempts to remove the screw make things worse. Once stripping starts, each try causes additional damage. The screw becomes harder to remove, not easier.
Manufacturing defects occasionally play a role too. Some set screws arrive with weak metal or poorly cut hex sockets. These fail even with normal use.
The design itself is vulnerable. Smart faucets use tiny screws to keep costs low. Small screws have less material to work with. Their hex sockets are shallow and narrow. This design leaves little room for error when installing or removing handles.
Understanding these causes helps you prevent future stripping. Gentle pressure, correct sizing, and clean surfaces protect your screws from damage.
Tools and Materials You’ll Need Before You Start
Before you tackle a stripped set screw, gather the right tools and materials. Having everything ready prevents frustration and stops you from making the problem worse.
Start with Allen keys in multiple sizes. You’ll need the original size that fits your faucet, plus the next size up. Sometimes a slightly larger key grips better in a partially stripped screw. Keep several sizes on hand because you may need to test different options.
A rubber band is one of your best friends here. Place a wide rubber band over the stripped screw head, then press your Allen key through it into the screw. The rubber fills gaps and creates extra grip. This simple trick works surprisingly well.
You’ll also want clean rags or paper towels. Wipe away any mineral deposits, corrosion, or grime around the screw. A clean surface helps you see exactly what you’re working with and improves tool contact.
Consider having epoxy on hand as a backup option. Two part epoxy like JB Weld can bond your Allen wrench directly into the screw. This method works when other approaches fail, though you’ll sacrifice the wrench.
For advanced situations, grab a screw extractor set. These special tools bite into stripped screws and pull them out. They’re inexpensive and worth keeping in your toolbox.
A thin flathead screwdriver helps too. You can use it as leverage under the screw head to help break it loose. A headlamp or flashlight makes it easier to see the small screw clearly.
Keep a container nearby to catch water when you open the faucet. Draining the line prevents mess and protects your workspace.
Quick Fixes: The Rubber Band and Larger Hex Key Methods
When your smart faucet handle set screw strips, two simple methods work best for most situations.
The rubber band method is your first line of defense. Place a wide rubber band directly over the stripped screw head. Press your Allen key firmly through the rubber band into the screw. The rubber fills the gaps where the hex key lost its grip. This increases friction and gives you better control. Turn slowly and steadily. This trick works surprisingly well for minor stripping.
If the rubber band doesn’t grip enough, try the next size up hex key. Many stripped screws still have enough metal contact for a larger Allen key to catch. Insert the bigger key and apply firm, steady pressure. Don’t force it or you’ll strip it further. Work slowly and let the tool do the work.
Epoxy bonding is your backup plan when simple methods fail. Use two part epoxy to glue your Allen wrench directly into the stripped screw. Press the wrench in firmly and let it cure for 24 hours. Once hardened, turn the wrench to remove the screw. This method works, but you’ll sacrifice that wrench since the epoxy bonds permanently.
Clean around the screw first before trying any method. Wipe away mineral buildup and corrosion with a damp cloth. This removes obstacles and gives your tools better contact.
Start with the rubber band approach. It costs nothing and takes two minutes. If that fails, move to the larger hex key. Save epoxy bonding for stubborn screws that won’t budge. These three methods handle most stripped set screw situations without expensive tools or professional help.
Using JB Weld Epoxy to Extract a Stripped Set Screw
JB Weld epoxy offers a reliable way to extract a stripped set screw when simpler methods fail. This two part epoxy bonds your Allen wrench directly into the damaged screw head, creating a temporary connection strong enough to turn it out.
Here’s how the process works. Mix equal parts of the epoxy according to package directions. Apply the mixed epoxy generously into the stripped screw hole. Press your Allen key firmly into the screw head and hold it steady for several minutes while the epoxy sets.
Let the bond cure for the full 24 hours. Don’t rush this step. The epoxy needs complete hardening to develop maximum grip strength.
After curing, turn the Allen key slowly and carefully. The epoxy bond should hold firm enough to rotate the screw. Work steadily without jerking or forcing the movement. If resistance builds, wait a bit longer before trying again.
Important note: This method sacrifices your Allen wrench. The epoxy permanently bonds it to the screw, so use a tool you don’t mind losing. Many people keep an older or spare wrench specifically for this purpose.
If the screw still won’t budge after epoxy curing, apply gentle heat to the faucet body using a hair dryer. Heat expands the metal slightly and can reduce friction. Try turning again with steady, even pressure.
Once you extract the screw, clean away remaining epoxy residue with a cloth before reassembling your faucet handle. This method succeeds when rubber bands and larger hex keys fail, making it an excellent backup solution for stubborn stripped screws.
Advanced Removal Techniques: Easy-Outs, Drilling, and Leverage Tricks
Easy-outs, also called screw extractors, are specialized tools designed to grip and remove damaged fasteners. They work by biting into the stripped screw’s core, giving you mechanical leverage to back it out.
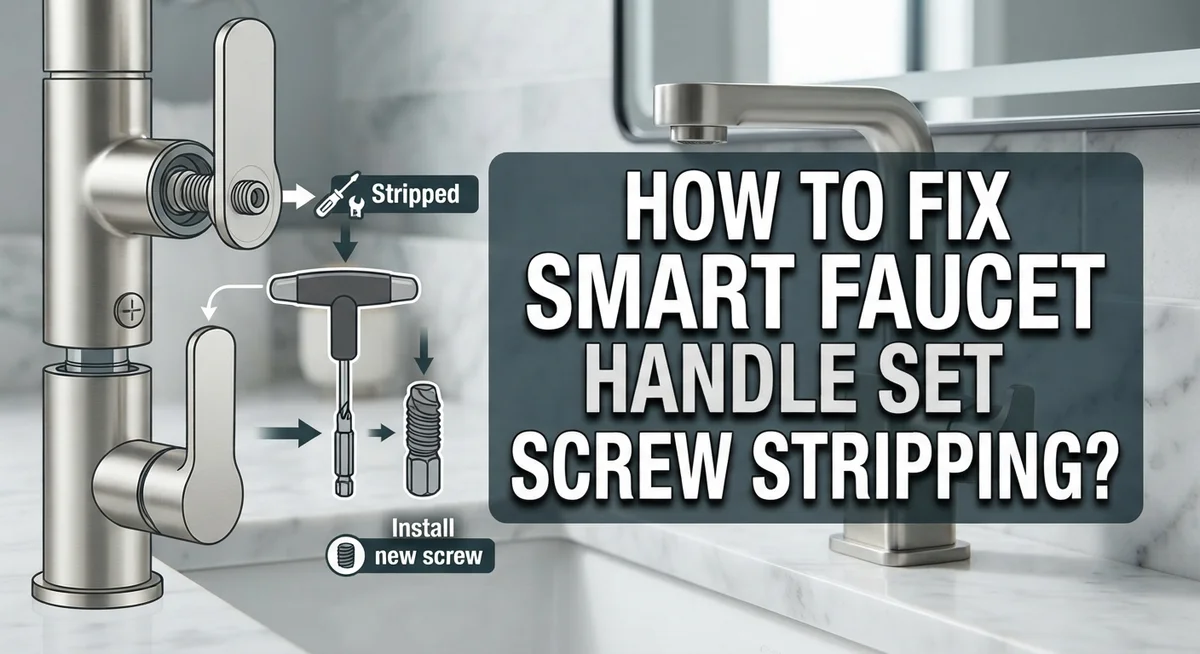
Here’s how to use an easy-out effectively. First, drill a small pilot hole into the center of your stripped set screw. The hole should be smaller than the screw itself. Insert the easy-out bit into your drill and slowly turn it counterclockwise. The extractor’s reverse threads dig into the screw material as you turn, creating a grip that pulls the screw out.
Start with the smallest easy-out size in your set. If that doesn’t catch, move to the next size up. Work slowly and apply steady pressure. Rushing this step can break the extractor inside the hole, making removal even harder.
Drilling out the screw is another option when easy-outs fail. Use a drill bit slightly smaller than the screw’s diameter. Drill straight down through the center of the stripped screw. This removes the screw entirely, leaving just an empty hole. You’ll need to install a new screw of the same size afterward.
Leverage tricks involve using a thin flathead screwdriver positioned under the screw head. Tap the screwdriver gently with a hammer to create small movements. These tiny shifts sometimes break the screw free from corrosion or debris holding it stuck.
Combine these techniques strategically. Try the easy-out first since it preserves the hole. Move to drilling only if extraction fails. Use leverage tricks as a preliminary step to loosen stubborn screws before attempting other methods. Patience and steady pressure work better than force with all three approaches.
Step-by-Step Walkthrough: From Diagnosis to Handle Removal
Before you attempt any removal method, you need to understand exactly what you’re dealing with. A stripped set screw means the Allen key no longer grips the hexagonal socket inside the screw. This happens when the wrench slips or you apply too much force.
Start by examining the screw closely. Look for visible damage inside the socket. Check if the Allen key slides around without catching. This confirms stripping. Clean away any mineral deposits or debris around the screw head using a soft cloth or old toothbrush. Sediment buildup can make the problem worse and hide the actual damage.
Test the current Allen key one more time with gentle, steady pressure. Sometimes light cleaning is all you need. If it still slips, you’ve confirmed the screw is stripped.
Next, assess your handle situation. Can you access the cartridge without removing the handle? Some smart faucets have cartridge access from underneath. If not, you must remove the handle to fix internal issues.
Determine which removal method fits your situation best. Simple methods work first. If the rubber band or larger hex key approaches fail, you’ll move to more advanced techniques. Your goal is removing the handle with the least damage to the faucet body.
Check your faucet manual for specific guidance on your model. Different smart faucet brands have varying handle designs and set screw locations. Some handles use multiple screws. Others use a single screw with an escutcheon or decorative cap.
Document what you see before starting removal. Take photos of the screw location and handle assembly. This helps during reassembly and provides reference if you need professional help later.
Common Mistakes That Make Stripping Worse
When your faucet handle set screw strips, certain mistakes make the problem much worse. Understanding what NOT to do helps you avoid causing permanent damage to your faucet.
Using the wrong Allen key size is the biggest culprit. Many people grab whatever wrench seems close enough. A loose fit causes the key to slip inside the screw’s hex hole. Each slip grinds away metal, making the hole rounder and deeper. Always test fit your Allen key first. It should slide in with a snug, firm grip.
Applying excessive force on an already stripped screw creates major problems. Once you feel resistance or slipping, stop immediately. Pushing harder only strips the screw further. Patience matters more than strength here. Gentle, steady pressure works better than aggressive turning.
Over torquing the escutcheon (the decorative ring around your faucet base) can trap water and debris around the set screw. This buildup makes removal harder later. Tighten this ring only until snug, not super tight.
Skipping drain protection leads to lost screws and parts. Small fasteners fall straight into your sink drain. Place a cloth or strainer in your drain before starting work.
Ignoring residue buildup around the screw prevents good tool contact. Mineral deposits, old caulk, or rust reduce your Allen key’s grip. Clean this area thoroughly with a cloth before attempting removal.
Repeating failed methods wastes time and causes more damage. If the rubber band approach doesn’t work after two tries, move to your next option. Knowing when to switch techniques saves your faucet from complete failure.
Troubleshooting: What To Do If the Screw Still Won’t Budge
When your Allen key spins without gripping the screw, you need a different approach. The screw hole itself has lost its shape, so standard techniques won’t work anymore.
Start by cleaning the screw area thoroughly. Dust, mineral deposits, and corrosion block tool contact. Use a dry cloth or soft brush to remove buildup around the screw head. This simple step often reveals whether you truly have a stripped screw or just poor visibility.
Try the rubber band method next. Place a wide rubber band flat over the stripped screw hole. Press your Allen key through the rubber band into the screw. The rubber fills the gaps between your tool and the damaged hole, creating extra grip. Apply steady, gentle pressure while turning slowly. This works surprisingly well for lightly stripped screws.
If the rubber band fails, try the next size up Allen key. Sometimes a slightly larger key wedges into the screw hole and catches enough material to turn it. Use steady pressure without forcing. Stop immediately if you feel resistance increasing.
For moderately stripped screws, consider the epoxy method. This involves gluing your Allen wrench directly into the screw hole using strong adhesive, then waiting for it to cure completely. This sacrifices your wrench but often works when other methods fail.
Never apply excessive force on a stripped screw. You’ll damage the hole further and make extraction nearly impossible later. Work slowly and methodically instead.
If these methods don’t work after several attempts, you’ve reached the point where advanced removal techniques become necessary. Easy-outs and drilling are your next options, but they require different tools and more careful handling.
Final Thoughts
Fixing a stripped set screw feels tricky at first. But most faucet handles come loose with patience and the right method.
Start simple. Try the rubber band trick or a bigger Allen key before moving to tougher options.
These easy fixes work for most mildly stripped screws. They cost little time and no special tools.
If those don’t work, epoxy glue can save the day. It bonds your wrench to the screw so you can twist it out together.
For screws that refuse to budge, easy outs and drilling become your next steps. These methods take more care but get the job done.
Always work slowly. Rushing causes more stripping and can damage your faucet body.
Clean the screw area before every attempt. Dirt and grime block tool grip and cause repeat failures.
Avoid common mistakes like using the wrong key size or forcing a spinning screw. These errors turn small problems into big repairs.
Protect your drain before you start. Loose screws and small parts fall easily and get lost fast.
Every faucet is different. Check your manual if you’re unsure about handle type or screw size.
Remember, this repair does not need a plumber in most cases. With the right approach, you can fix it yourself.
Take your time and test each method fully before moving to the next. Skipping steps often leads to more damage.
Once your screw comes loose, clean the threads and check the handle mechanism. This helps you avoid the same issue later.
A stripped screw feels frustrating, but it’s fixable. Stay calm, work through each step, and your faucet handle will be spinning freely again soon.
Frequently Asked Questions
Why does my Allen key keep spinning in the set screw?
The hex socket inside your set screw has worn down and lost its sharp edges. When metal meets metal repeatedly, the corners round off. Your Allen key no longer has anything to grip, so it just spins freely. This happens faster if you use the wrong size key or apply too much force.
The good news? You can still fix this. Stop trying immediately and switch methods. Continuing to force the key will only damage the screw more.
Can I use a bigger Allen key to fix a stripped screw?
Yes, this often works for mildly stripped screws. Try the next size up from what you’ve been using. The larger key might catch on the remaining edges of the hex socket.
Push the key in firmly and turn slowly. If you feel resistance, you’ve found grip. If it spins freely, the damage is too severe for this method and you’ll need to try something else.
What is the rubber band method and does it really work?
Place a wide rubber band flat over the stripped screw hole. Press your Allen key through the rubber band and into the screw. The rubber fills the gaps between the key and the worn socket, creating friction and grip.
This works best on screws that are just beginning to strip. It’s free, quick, and worth trying before moving to more complex solutions. Push down hard while turning slowly.
How long does the epoxy glue method take?
The epoxy method requires 24 hours of curing time. You insert an Allen wrench into the stripped screw and coat it with epoxy adhesive. Once it hardens, the wrench becomes permanently bonded to the screw, giving you something solid to turn.
This sacrifices your wrench, but it saves your faucet. Plan ahead since you cannot use the faucet during the curing period.
What should I do if nothing works?
You’ve reached the point where advanced removal tools become necessary. Easy-outs (screw extractors) and careful drilling are your next options. These methods require more precision and patience, but they remove stubborn screws that won’t respond to simpler fixes.

Hi, I’m Rue Hessel, the founder and voice behind TheGenTool. I’m a passionate tech enthusiast who loves exploring the latest gadgets, smart devices, and electronics that shape our everyday lives. Through my website, I share honest, hands-on reviews of trending Amazon products to help you make smarter and more confident buying decisions.