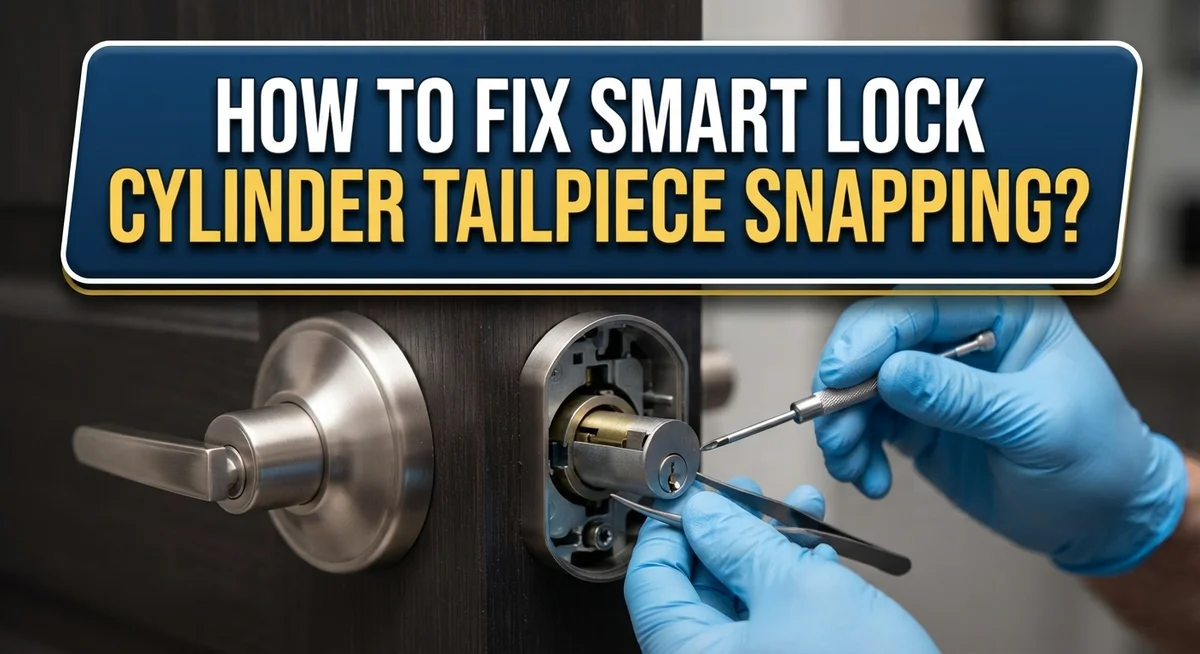
How To Fix Smart Lock Cylinder Tailpiece Snapping?
Your smart lock feels loose. You turn the key, but nothing happens inside the door. This is a classic sign of a snapped tailpiece.
A broken tailpiece is a common problem with smart locks. It happens when the small metal rod connecting your key cylinder to the locking mechanism breaks or disconnects. The result? Your key spins freely without actually locking or unlocking the door.
Don’t panic. This issue is usually fixable without calling a locksmith.
In a Nutshell
- Check your screws first. Loose screws are the top reason a tailpiece snaps or spins. Tighten them before you try anything else.
- Look for a backed out set screw. This is the main cause of a cylinder that spins freely without locking or unlocking your door.
- Inspect your door alignment. A misaligned deadbolt puts extra strain on the tailpiece. This strain leads to breakage over time.
- Replace the broken tailpiece. If your keyed entry set has a snapped tailpiece, swap it out with a new one that fits your model.
- Remove the old Euro cylinder carefully. Use a smart key re-key tool to take out the damaged cylinder without causing more harm.
- Install the new lock with care. Make sure it sits snug and lines up properly. Secure it with screws and test it right away.
What Causes a Smart Lock Cylinder Tailpiece to Snap
A smart lock cylinder tailpiece snaps when forces push beyond what the part can handle. Understanding the root causes helps you prevent this issue and fix it faster.
Loose or backed out set screws create the most common problem. These small screws hold the tailpiece firmly in place. When they loosen over time, the tailpiece spins freely inside the cylinder. Your key turns, but nothing locks or unlocks. This spinning motion eventually causes stress fractures that lead to snapping.
Misaligned deadbolts put excessive pressure on the tailpiece. If your door frame shifted or the deadbolt installation wasn’t straight, the tailpiece bears weight it wasn’t designed to carry. This constant strain weakens the part until it breaks suddenly.
Poor cylinder installation causes many failures. When you insert a Euro cylinder at an angle or don’t push it in completely, the tailpiece doesn’t align with the lock mechanism. The misalignment forces the tailpiece to work harder than normal, speeding up wear and breakage.
Material fatigue happens over time with regular use. Even quality tailpieces wear down after years of turning. Repeated locking and unlocking cycles create tiny stress points that eventually crack.
Forced turning damages the tailpiece quickly. If someone tries to turn the key too hard or with excessive force, the tailpiece can snap immediately. This happens especially with frozen locks or when people don’t realize the door is already locked.
Improper Euro cylinder replacement introduces snap risks. If you don’t remove the old cylinder correctly or install the new one carelessly, alignment problems develop right away. The tailpiece starts failing within weeks instead of years.
Signs Your Tailpiece or Set Screw Has Failed
Your smart lock will show clear warning signs before the tailpiece completely fails. Learning to spot these signals helps you fix problems early and avoid getting locked out.
The most obvious sign is key resistance. When you turn your key, it should move smoothly. If you feel grinding, clicking, or unusual friction, your tailpiece or set screw may be failing. The key might also spin freely without engaging the lock mechanism at all.
A spinning cylinder is another major red flag. If your key turns but the deadbolt does not move, the set screw has likely backed out completely. This happens gradually, so you might notice the bolt becoming harder to operate over several days.
Listen for unusual sounds when operating your lock. Rattling, grinding, or clicking noises indicate internal damage. These sounds often come from a loose set screw bouncing inside the cylinder or a partially broken tailpiece.
Check if your deadbolt moves unevenly. A properly functioning bolt should slide smoothly in and out. If it sticks, hesitates, or requires extra force, misalignment or internal damage is likely present.
Your lock may also feel loose or wobbly when you touch the cylinder. Gently wiggle the lock body. Excessive movement means fasteners have backed out or the tailpiece has cracked.
Pay attention to intermittent failures. If your lock works sometimes but not others, a partially backed out set screw is the usual culprit. The screw moves slightly with each use until it backs out completely.
These warning signs appear before total failure occurs. Acting quickly when you notice them prevents emergency lockouts and extends your lock’s lifespan.
Tools You Need Before Starting the Repair
Before you start fixing a snapped tailpiece, gather the right tools. Having everything ready saves time and prevents frustration during the repair.
You’ll need a screwdriver set with multiple sizes. Most smart lock cylinders use Phillips and flathead screws. Make sure your screwdrivers fit snugly into the screw heads to avoid stripping them.
A smart key re-key tool is essential for removing the damaged cylinder safely. This specialized tool prevents additional damage when extracting the old lock. You can find these tools at hardware stores or online retailers that sell lock supplies.
Keep a flashlight or headlamp nearby. Working inside door frames is dark, and good lighting helps you see screw positions and alignment issues clearly.
Grab a measuring tape to check door alignment. Misaligned doors cause excessive pressure on tailpieces, so confirming proper alignment is important before installation.
You’ll also need a replacement tailpiece or cylinder depending on your lock type. Measure your current cylinder first to ensure the new one matches your door setup.
Have a small container ready for screws and small parts. Losing hardware during repair creates delays and frustration.
A level tool helps verify that your door frame sits straight. Uneven frames put stress on lock components and cause premature failure.
Wear work gloves to protect your hands from sharp edges and metal burrs on the cylinder.
Finally, keep your lock manual or product documentation nearby. Different smart lock brands have specific requirements for cylinder replacement and alignment.
Preparing these tools beforehand makes the entire repair process smoother and faster.
Step-by-Step: Diagnosing and Tightening Loose Screws
Loose screws are the primary cause of cylinder tailpiece problems. Start by identifying which screws need attention. Your smart lock has set screws that hold the cylinder in place and prevent it from spinning freely.
Locate all visible screws on your lock assembly. Most smart locks have screws on the interior side of the door. You’ll find at least one set screw that secures the tailpiece to the cylinder itself. Check the screws around the deadbolt housing as well.
Use the correct screwdriver size for each screw. A screwdriver that’s too small will slip and strip the screw head. A screwdriver that’s too large won’t fit properly. Start with your screwdriver set and test each size gently.
Tighten each screw gradually rather than forcing them. Turn clockwise until you feel resistance, then stop. Over tightening can crack the plastic housing or strip the threads. You want snug contact, not maximum force.
Pay special attention to the set screw on the tailpiece itself. This screw often backs out from regular use. If this screw is loose, your cylinder will spin freely even though nothing is broken.
Test your lock after tightening. Insert your key and turn it slowly. The deadbolt should move smoothly without resistance. The cylinder should not spin independently.
If tightening doesn’t solve the problem, the tailpiece itself may be cracked or broken. Inspect it visually for cracks or damage. A broken tailpiece requires replacement rather than adjustment. Check your lock’s manual for the correct replacement part specifications.
Step-by-Step: Replacing a Broken Tailpiece or Euro Cylinder
Start by removing the interior side of your smart lock to access the tailpiece. Locate the set screw that holds the tailpiece in place. Use your screwdriver to remove this screw completely and set it aside in a safe container.
Next, gently pull the broken tailpiece away from the lock body. You may need to wiggle it slightly to free it from the cylinder. Take note of how the old tailpiece was positioned before removal. This helps you install the new one correctly.
If you’re replacing a Euro cylinder instead, use your smart key re-key tool to remove the damaged cylinder carefully. Insert the tool into the keyway and turn it gently until the cylinder releases. Slide the cylinder out slowly and avoid forcing it.
Before installing the replacement, inspect the lock body for debris or damage. Clean out any dirt or metal shavings with a dry cloth. Check that the mounting hole is clean and ready for the new part.
Insert your replacement tailpiece or Euro cylinder into the correct position. Ensure it sits snug against the lock body without gaps. The cylinder should align perfectly with the deadbolt mechanism.
Reinstall the set screw through the tailpiece and into the lock body. Tighten it firmly but don’t over tighten, as this can crack the new part. Test your lock by turning the key from both sides.
Verify that the deadbolt moves smoothly and completely. The key should turn without resistance or spinning freely. If everything works properly, your repair is complete. If problems persist, the issue may involve door frame misalignment rather than the tailpiece itself.
Ensuring Proper Alignment After Reinstallation
After you reinstall your smart lock cylinder or tailpiece, alignment is critical. A misaligned cylinder prevents your deadbolt from operating smoothly. The key will spin without locking or unlocking if alignment is off.
Start by checking that your cylinder sits flush against the lock body. There should be no gaps between the cylinder and the surrounding metal. Gently wiggle the cylinder to confirm it’s seated properly before tightening any screws.
Next, verify your door frame is straight. A warped or misaligned door frame causes cylinder problems even when the lock itself is fine. Use a level tool to check if your door hangs evenly. If the frame is crooked, address the door alignment first.
Insert your key and turn it slowly through its full range. The key should move smoothly from locked to unlocked position without catching or jamming. If you feel resistance, the cylinder may still be misaligned.
Now tighten the set screw that secures the tailpiece. Apply steady pressure without over tightening, which can crack the cylinder. The set screw should hold the tailpiece firmly in place but not be stripped.
Test your deadbolt operation several times. Push and pull the bolt to ensure it extends and retracts completely. The bolt should move with consistent resistance, not suddenly catch or stick.
Check alignment again after 24 hours of use. Sometimes cylinders settle slightly after installation. If alignment issues persist, remove the cylinder and inspect the lock body for debris or damage. Clean any obstructions before reinstalling.
Proper alignment prevents future snapping and ensures your smart lock functions reliably long term.
Common Mistakes That Lead to Repeat Snapping
Many people make simple mistakes that cause their tailpiece to snap repeatedly. Understanding these errors helps you avoid the same problem.
Skipping the tightening step is the biggest mistake homeowners make. You must check every screw on your lock assembly before assuming the tailpiece is broken. Most snapping issues stem from loose screws, not actual damage. Take time to tighten each screw gradually using the correct screwdriver size.
Another common error is forcing the cylinder during replacement. People rush the installation process and don’t align the cylinder properly with the lock body. This misalignment puts stress on the tailpiece from day one. Take your time inserting the replacement piece and ensure it sits flush against the lock body.
Ignoring set screw maintenance causes repeat failures. The set screw backs out over time from regular key turning. Once it backs out, your cylinder spins freely and the tailpiece eventually snaps. Check this screw monthly and tighten it as needed.
Poor door frame alignment is often overlooked. A crooked door frame forces your lock to work at an angle. This creates uneven pressure on the tailpiece every time you use your key. Before replacing anything, verify your door frame is straight using a level tool.
Many people also install a replacement tailpiece without inspecting the lock body first. Debris or damage inside the housing can cause the new piece to snap quickly. Always clean the lock body and check for cracks before installation.
Finally, some homeowners test their lock once after repair and assume it’s fixed. You should test your deadbolt multiple times over the first week. Check alignment again after 24 hours of regular use to catch any new problems early.
Preventing Future Tailpiece and Cylinder Failures
Preventing future tailpiece and cylinder failures starts with understanding what causes them in the first place. Most snapping issues come from repeated stress on poorly maintained components. You can avoid this by developing simple maintenance habits.
Check your set screws every three months. These small fasteners back out over time due to vibration and door movement. A backed-out set screw allows your cylinder to spin freely, which puts pressure on the tailpiece and causes cracking. Simply tightening these screws prevents 80% of repeat failures.
Keep your door frame straight and level. A misaligned door creates uneven pressure on your lock cylinder. This constant strain weakens the tailpiece gradually. Have your door frame inspected if your lock keeps failing despite proper maintenance.
Use gentle, steady pressure when turning your key. Forcing or rushing the locking motion damages internal components faster. Treat your smart lock like any precision device. Smooth, controlled movements extend its lifespan significantly.
Install your replacement cylinder correctly from the start. Rushing this step causes misalignment that leads to future snapping. Take time to ensure your cylinder sits flush against the lock body before securing it.
Test your lock regularly after any repairs. Turn your key through its complete range several times weekly. This catches small problems before they become expensive failures.
Store your smart key safely to avoid losing it. A lost key forces you to replace your entire cylinder system. Keeping your key secure prevents unnecessary replacements that introduce installation errors.
Document when you perform maintenance. This simple record helps you spot patterns in your lock’s behavior. If failures happen seasonally or after certain weather changes, you can prepare accordingly and prevent problems before they occur.
Final Thoughts
A snapped tailpiece feels like a big problem. But it’s actually simple to fix.
Most cases come down to loose screws or poor alignment. Tighten everything first before you replace any parts.
If the tailpiece is broken, you’ll need to swap it out. Remove the old cylinder carefully and insert the new one with a snug fit.
Alignment matters more than people think. A cylinder that doesn’t sit flush against the lock body will snap again soon. Take your time during installation.
Test your lock several times after any repair. Turn the key slowly and check that the deadbolt moves without resistance.
Don’t rush this process. A few extra minutes now saves you from repeating the same repair next month.
Set screws back out over time. Check them regularly, even if your lock seems fine.
Door frames shift too. A misaligned frame puts pressure on your cylinder and causes premature wear.
Prevention is always easier than repair. Keep your smart lock maintained, and you’ll avoid most tailpiece problems altogether.
If you’ve tried these steps and your lock still won’t work properly, the issue might be deeper than a simple tailpiece snap. At that point, calling a locksmith makes sense.
Smart locks are convenient, but they still have mechanical parts. Those parts need care like any other lock.
Small habits like tightening screws and checking alignment go a long way. They keep your smart lock working smoothly for years.
Fixing a snapped tailpiece isn’t complicated once you know the steps. Follow them carefully, and your lock will function reliably again.
Frequently Asked Questions
Why does my smart lock cylinder keep spinning without locking?
Your cylinder spins freely when the set screw backs out over time. This tiny screw holds the tailpiece in place. When it loosens, the cylinder rotates but doesn’t engage the lock mechanism.
Check the set screw first. Locate it on the side of your cylinder. Tighten it gently with the correct tool. Test your lock after tightening.
If tightening doesn’t work, the tailpiece itself may be broken and need replacement.
Can I fix a snapped tailpiece myself?
Yes, you can replace a broken tailpiece on most keyed entry sets. The process involves removing the old cylinder and installing a new one.
First, use a smart key re-key tool to remove the old Euro cylinder. Insert your new lock carefully. Make sure it sits snug and aligns properly with the door mechanism.
Secure everything with screws and test multiple times. Proper alignment prevents future snapping.
What causes tailpiece snapping in the first place?
Misalignment is the main culprit. When your door frame shifts or your cylinder isn’t installed straight, pressure builds on the tailpiece. Forcing your key or turning it too hard also damages internal parts.
Poor installation technique causes many failures. Rushing the replacement process or ignoring alignment checks leads to problems.
Set screws that back out create free-spinning cylinders. This puts stress on the tailpiece until it breaks.
How often should I check my lock’s set screws?
Check your set screws every three months. This simple habit prevents most tailpiece failures.
Tighten them gently if they’ve loosened. Don’t over tighten, as this can strip the screw.

Hi, I’m Rue Hessel, the founder and voice behind TheGenTool. I’m a passionate tech enthusiast who loves exploring the latest gadgets, smart devices, and electronics that shape our everyday lives. Through my website, I share honest, hands-on reviews of trending Amazon products to help you make smarter and more confident buying decisions.