How To Fix Motorized Spice Rack Carousel Track Derailing?
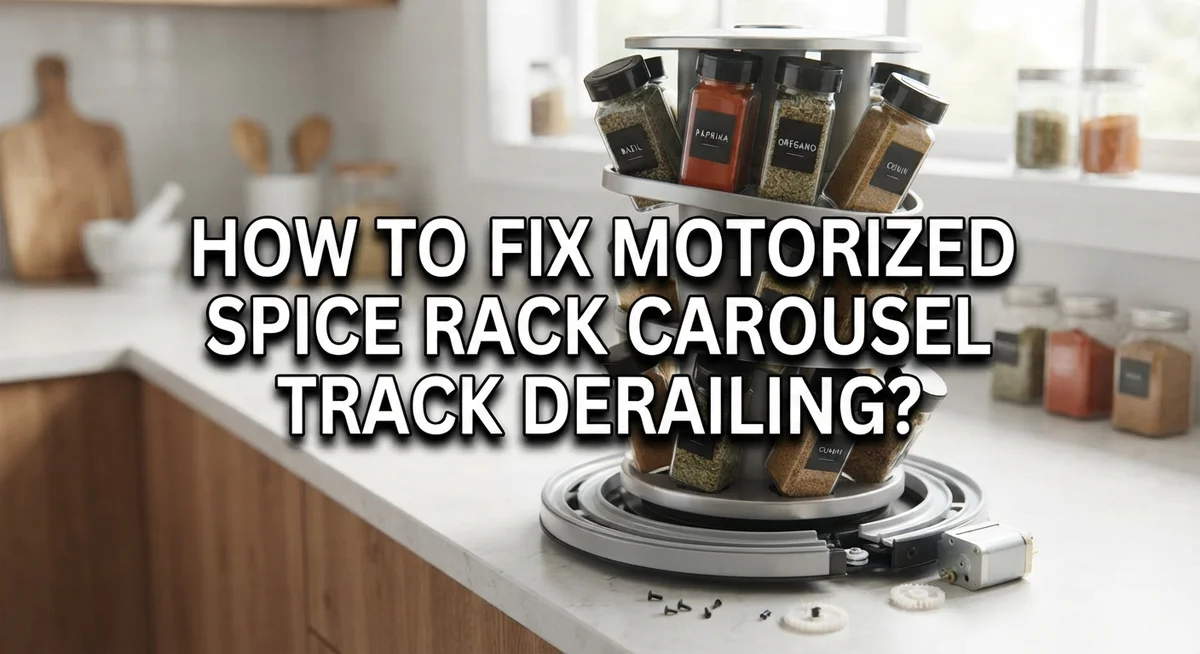
Your motorized spice rack makes cooking so much easier. But then one day, the carousel jumps off its track. It wobbles, slides, or falls out completely.
This problem happens more often than you think. The good news? You can fix it yourself at home.
Most of the time, the issue comes down to small parts. Black clips inside the track slides can wear out or shift out of place. Loose screws often make the problem worse too.
The carousel needs proper support to stay in its track. Without it, even a light touch can cause derailing.
In a Nutshell
- Check the black clips first. These small clips sit inside the track slides. They often become the main reason your carousel derails.
- Tighten loose screws. Loose hardware is a common cause. A few turns with a screwdriver can solve the problem fast.
- Realign before you reinsert. Do not force the carousel back into place. Line it up carefully with the track first.
- Add a rubber shim if needed. If there is a gap between the carousel and track, a small shim adds stability.
- Drill an extra screw for support. This works well if the unit still feels wobbly after basic fixes.
- Avoid rushing the repair. Skipping inspection steps often leads to the same problem again.
Understanding Why Your Carousel Derails from the Track
Your motorized spice rack carousel sits on a track system that relies on several small components working together. When the carousel derails, something in this system has failed or shifted out of place.
The black clips inside the tracks are your first suspect. These clips grip the carousel and keep it centered as it spins. Over time, clips can bend, crack, or shift sideways. When a clip moves even slightly, the carousel loses its grip on the track and slides out of position.
Loose screws and fasteners cause derailing more often than you might think. The mounting hardware that holds the track to your cabinet can loosen from vibration and regular use. When screws become loose, the entire track system shifts. This shift creates gaps between the carousel and the track opening, allowing the unit to slip free.
Worn or damaged track slides also contribute to derailing problems. If the track itself has bent spots or rough areas, the carousel cannot roll smoothly. The carousel catches on these damaged sections and pops out of alignment.
Gaps between the carousel and track opening create space for the unit to move sideways. Without snug contact, the carousel has room to shift and eventually derail. Even a small gap of one quarter inch can cause problems over time.
Improper initial installation is another common cause. If the carousel was not centered correctly when first installed, it sits at an angle on the tracks. This uneven position puts pressure on one side of the clip system, causing faster wear and eventual failure.
Understanding these causes helps you identify exactly what went wrong with your spice rack. Most derailing issues stem from one or more of these problems working together. The good news is that each cause has a straightforward fix that requires only basic tools and simple steps.
Tools and Materials You’ll Need Before Starting
Before you start fixing your motorized spice rack carousel, gather the right tools and materials. Having everything ready makes the repair faster and smoother.
You will need a Phillips head screwdriver to tighten loose fasteners. This is the most important tool for this job. Many derailing issues start with loose screws, so a good screwdriver matters.
A flathead screwdriver helps you inspect and adjust the black clips inside the track slides. You may need to pry gently to check if clips sit properly in place.
Keep a measuring tape nearby. You will use it to check gaps between the carousel and the track opening. Knowing the exact gap size helps you choose the right rubber shim thickness.
A rubber shim or spacer fills gaps that cause sideways movement. You can find these at any hardware store. They come in different thicknesses, so measure first before buying.
Have a drill with bits available if you decide to add an extra screw for reinforcement. This step only becomes necessary if basic fixes do not work. A standard household drill works fine for this task.
Grab some masking tape to mark problem areas. You can tape spots where the carousel sits loose or where clips need adjustment. This helps you remember what to check during reassembly.
Keep a small flashlight or headlamp handy. The inside of the track slides is dark, and you need good visibility to see clip alignment and damage.
A cloth or rag cleans dust and debris from the track before you reinstall the carousel. Clean tracks help the unit sit properly.
Finally, have a notepad nearby to write down what you find during inspection. Notes help you troubleshoot systematically and avoid repeating mistakes.
Gathering these items takes just a few minutes but saves you time during the actual repair.
Step-by-Step: Inspecting and Repairing the Track Clips
Start by unplugging your motorized spice rack carousel. Safety comes first when you work with electrical appliances. Wait a few minutes before you begin any inspection or repair work.
Use your flathead screwdriver to gently inspect the black clips inside the track slides. These clips hold your carousel in place. Look for visible cracks, bending, or areas where the clip no longer grips the carousel body tightly. Black clips that are bent outward no longer provide proper support. If a clip looks damaged, you may need to carefully bend it back into position using your flathead screwdriver. Work slowly to avoid breaking the clip completely.
Check if each clip sits flush against the carousel. Misaligned clips allow the unit to shift sideways during rotation. Gently tap the clip with your screwdriver handle to reposition it if needed. The clip should hold the carousel snugly without excessive force.
Inspect the track slides themselves for debris, dust, or obstructions. Wipe away any buildup using a dry cloth. Dirt inside the tracks prevents clips from gripping properly. Pay special attention to the inner edges where clips make contact.
Look for rust or corrosion on metal clips and track surfaces. Light surface rust can be cleaned with a dry cloth or soft brush. Heavier corrosion may require a bit more attention to restore proper contact between clip and carousel.
Once you finish inspecting, carefully reinsert the carousel into the track slides. Align the clips first before pushing the unit forward. Slide the carousel straight in without twisting or forcing it. The unit should glide smoothly into place.
After reinsertion, manually rotate the carousel by hand a few times. It should spin freely without catching or binding. If you feel resistance, stop and check the clip alignment again. Proper inspection of these clips prevents future derailing problems and keeps your spice rack working smoothly.
Step-by-Step: Reinstalling the Carousel into the Track Slides
Start by ensuring your carousel is completely unplugged and safe to handle. Position yourself so you can see both the left and right track slides clearly. You’ll need good lighting to spot the black clips inside each track.
Gently slide the carousel toward the track opening. Move it slowly and watch how the clips respond. The clips should grip the carousel sides smoothly without resistance. If you feel grinding or hear clicking sounds, stop immediately and check for clip misalignment.
Align the carousel unit so it sits centered in the track opening. Use your measuring tape to verify equal spacing on both sides. This prevents one clip from bearing more weight than the other. Uneven alignment causes immediate derailing once you power the unit back on.
Insert the carousel into the slides using steady, even pressure. Push from the center of the unit rather than from one side. This distributes force evenly across both clips. Avoid forcing the carousel if it meets resistance. Forcing it can bend clips or damage the track permanently.
Once the carousel sits fully in the tracks, manually rotate it by hand several times. It should move smoothly without wobbling or catching. Feel for any grinding sensations that indicate clip problems. Rotate it in both directions to test complete movement.
Check that the carousel sits level inside the opening. Look at the top edge from different angles. The unit should appear parallel to the track opening. If it tilts or sits crooked, remove it and reinspect the clips.
Tighten all visible screws around the carousel mounting points. Loose hardware often causes derailing even after proper reinstallation. Use your Phillips head screwdriver to secure every fastener you can access.
Test the carousel manually one more time before plugging it back in. Ensure smooth rotation without any hesitation or noise. Only then should you restore power and test the motorized function.
Reinforcement Tips: Shims, Screws, and Stabilizers
When your motorized spice rack carousel keeps derailing, reinforcement is your best friend. This section walks you through simple stabilization methods that prevent future problems.
Start by tightening every screw you can see around the carousel mounting area. Loose hardware is the number one culprit behind derailing issues. Use your Phillips head screwdriver and turn each screw clockwise until snug. Do not overtighten, as this can strip threads or crack plastic components.
Next, check for gaps between your carousel and the track slides. These gaps let the unit shift sideways during rotation. A rubber shim or spacer fills these spaces effectively. Slide the shim material between the carousel edge and the track wall. This creates a snug fit that prevents wobbling.
If your carousel still moves side to side, consider adding an extra screw below the main mounting point. This reinforcement screw provides additional support. Mark the location with masking tape first. Use your drill to create a pilot hole, then insert the new screw carefully. This method adds stability without requiring major modifications.
Rubber stabilizers work differently than shims. Stabilizers attach directly to the carousel base and contact the track surface. They absorb vibration and reduce friction that causes derailing. Position stabilizers at stress points where the carousel bears the most weight.
Inspect your reinforcement work by manually rotating the carousel several times. The unit should move smoothly without wobbling or tilting. Listen for unusual sounds that indicate binding or friction.
These reinforcement tips address the root cause of derailing: insufficient support and loose connections. Combining multiple methods gives you the best results. Start with screw tightening, add shims to fill gaps, then use stabilizers if needed. Most derailing problems disappear after applying these straightforward reinforcement techniques.
Common Mistakes That Make Derailing Worse
Many people rush the repair process and create bigger problems. The most dangerous mistake is forcing the carousel back into tracks without checking the black clips first. When you push hard, you can bend or break the clips permanently. This makes future repairs much harder.
Ignoring loose hardware is another major error. Most carousel derailing starts with screws that have come loose over time. People often skip this step and jump straight to replacing parts. Always tighten every screw around the mounting area before you assume anything else is broken.
Skipping track inspection leads to repeated failures. Debris, dust, and rust inside the track slides cause the carousel to slip repeatedly. If you don’t clean these surfaces, your carousel will derail again within days. Take time to check the entire track length carefully.
Another common mistake is installing the carousel at an angle. People often rush the reinsertion process and don’t center the unit properly. The carousel must sit level in the opening, or gravity will pull it sideways over time.
Adding reinforcement without fixing the root cause wastes your effort. Some people add extra screws or shims without first tightening existing hardware or cleaning the tracks. This approach treats the symptom, not the problem.
Never skip the manual rotation test after reinstalling. Spinning the carousel by hand reveals whether clips sit flush and whether the unit moves smoothly. This simple check catches alignment issues before you plug the unit back in.
Finally, avoid working on a powered carousel. Always unplug your motorized spice rack before touching any internal parts. Working on an active unit risks injury and can damage the motor if something catches inside.
Troubleshooting Persistent or Recurring Derailment
When your motorized spice rack carousel keeps derailing even after basic fixes, you need a systematic approach to find the real problem. Persistent derailing usually signals that clips, screws, or track alignment need deeper inspection.
Start by unplugging the unit completely. Remove the carousel and examine the black clips inside the track slides carefully. Look for cracks, bending, or permanent deformation. Clips that no longer grip properly cannot hold the carousel securely, no matter how many times you reinstall it.
Next, inspect the track slides themselves. Run your fingers along the inside edges to feel for debris, rust, or warping. Even small obstructions prevent clips from seating correctly. Clean the tracks thoroughly with a dry cloth.
When you reinstall the carousel, pay close attention to how the clips engage. They should slide smoothly into the grooves without resistance. If clips feel stuck or misaligned, stop and adjust before pushing further. Forcing the carousel into misaligned clips guarantees another derailment.
Check every single screw around the mounting area. Use the appropriate tool and tighten each one firmly. Loose hardware is the leading cause of recurring problems. Many people skip this step, which explains why derailing repeats.
If derailing continues after these checks, measure any gaps between the carousel and track slides. Rubber spacers or shims fill these gaps and prevent side to side movement. Position them carefully before reinstalling.
For stubborn cases, consider adding an extra screw below the main mounting point. This provides additional support where the carousel tends to shift. Drill carefully and use the correct screw size for your unit.
After any reinforcement work, manually rotate the carousel by hand multiple times. This reveals whether your fix actually stopped the movement. Test thoroughly before plugging the unit back in. If derailing persists after these detailed steps, the track system itself may need replacement.
Final Thoughts
Fixing a derailing spice rack carousel does not need to be complicated. Most problems come from loose screws, misaligned clips, or worn track slides.
Start simple before assuming the worst. Tighten hardware first. Check clip alignment second. These two steps solve most derailing issues.
If basic fixes don’t work, add reinforcement. A rubber shim or extra screw often provides the stability your carousel needs.
Remember to always test manually before plugging the unit back in. This small habit saves you from repeated frustration and repair cycles.
Patience matters more than speed in this repair. Rushing leads to mistakes like forcing parts into place or skipping inspection steps.
Take time to examine each component. Look at the clips, the track condition, and the screw placement. Small details make a big difference here.
Most spice rack carousels fail because of neglect, not defects. Regular checks on screws and clips prevent derailing before it starts.
If your carousel keeps derailing despite every fix, the track itself might be worn out. Sometimes replacement parts work better than repeated repairs.
Don’t feel discouraged if the first attempt doesn’t work. Carousel repairs often take a few tries to get right.
Each adjustment teaches you more about how your specific unit behaves. This knowledge helps with future maintenance too.
Keep your tools handy for quick fixes. A screwdriver and some rubber spacers can solve most problems within minutes.
The goal is a stable, smooth-running carousel that holds your spices without falling off track. With the right approach, this is achievable for almost anyone.
Fixing this issue does not require professional help in most cases. Basic tools and careful attention get the job done well.
Trust the process, follow each step, and your carousel will run smoothly again soon.
Frequently Asked Questions
Why does my carousel keep sliding out of the track?
Loose screws are the main culprit. The mounting hardware works itself free over time, especially with regular use. Start by tightening every screw you can find around the track area. You should also check if the black clips inside the tracks are bent or misaligned. These clips hold your carousel in place. If they’re damaged, the carousel won’t stay secure no matter how tight your screws are.
How do I safely reinstall the carousel into the track slides?
First, unplug the unit completely. Align the carousel clips with the track openings before you push it in. Move slowly and carefully. Don’t force it. If you feel resistance, stop and check the clip alignment again. Once the carousel is seated, verify it sits level and straight. Then manually rotate it by hand several times to confirm smooth movement before plugging it back in.
What should I do if basic tightening doesn’t fix the derailing?
Inspect the gap between your carousel and the track slides. If you see spaces, insert a rubber spacer or shim to remove the gap. This extra support prevents the carousel from shifting. Check the track condition too. Cracks or bends in the track itself mean you may need to replace that component.
When should I add an extra reinforcement screw?
Add a reinforcement screw below the main mounting point if derailing continues after you’ve tightened hardware and aligned clips. This gives your carousel additional support where it needs it most. Drill carefully and use the appropriate screw size for your unit.

Hi, I’m Rue Hessel, the founder and voice behind TheGenTool. I’m a passionate tech enthusiast who loves exploring the latest gadgets, smart devices, and electronics that shape our everyday lives. Through my website, I share honest, hands-on reviews of trending Amazon products to help you make smarter and more confident buying decisions.