How To Fix Heated Car Seat Cushion Blowing Fuses In 12V Sockets?
Your heated car seat cushion feels great on cold mornings. Then suddenly it stops working. You check the fuse box and find a blown fuse again.
This problem frustrates many drivers. You replace the fuse, and it blows again within days. It feels like a never ending cycle.
The good news is this issue has a clear cause and a simple fix. Most of the time, a faulty seat heater pad or controller creates too much resistance. This forces the fuse to overheat and blow.
In a Nutshell
- Blown fuses happen because tiny blade fuses carry little resistance. This creates extra heat and stress in the circuit.
- The real cause is often a faulty heat pad or a bad controller. It is rarely the wiring itself.
- Always disconnect the seat heaters first. Test the switch alone to see if the fuse still blows.
- If the fuse stays fine without the pads connected, your wiring is safe. The pad or controller needs attention instead.
- Replace a blown fuse with the same amperage rating every time. A higher rating can cause a fire hazard.
- For a lasting fix, install a heavy duty fuse holder. This step protects your circuit from repeat failures.
- Use heat shrink tubing on any splice connection. Skipping this step often leads to loose wires and new problems.
- Remember, one blown fuse under the driver seat is common. Fixing it properly stops the cycle for good.
Why Heated Seat Cushions Blow Fuses in 12V Sockets
Your heated seat cushion blows fuses because the electrical circuit demands more power than the tiny blade fuse can safely handle. This happens when something inside the system fails and creates a short circuit or excessive current draw.
The most common culprit is a faulty heating element in the seat pad itself. Over time, the wires inside the cushion can wear down, crack, or touch metal parts they shouldn’t. When this happens, electricity flows in the wrong direction and overwhelms the fuse.
Another frequent cause is a broken controller located under your seat. This device regulates power to the heating element. If the controller fails internally, it can send too much current through the circuit at once. The fuse then blows as a safety measure to prevent a fire.
Moisture and corrosion also play a role. Water entering the seat assembly or controller creates unwanted electrical paths. Salt from winter roads speeds up this corrosion process. Once rust forms on connections, resistance increases dramatically, causing excessive heat and fuse failure.
A third reason involves poor wiring connections. Loose terminals or damaged wires force electricity to work harder to reach the heating pad. This extra effort generates heat that trips the fuse.
The good news is that fuses blow by design. They protect your car from electrical fires. When a fuse blows, it’s telling you something needs attention. The problem isn’t the fuse itself. The fuse is doing its job correctly. Your job is finding which component inside the heated seat system has failed and fixing or replacing it.
Tools and Safety Precautions Before You Start
Before you start fixing your heated seat cushion, gather the right tools and follow safety steps. This protects you and your vehicle.
Essential Tools You Need
First, get a multimeter to test electrical circuits. You will use this to check if power reaches your seat heater. A basic multimeter costs very little and lasts for years. Next, find a flashlight or headlamp. You will work under the seat where light is dim.
Get a set of screwdrivers in different sizes. Most seat cushion connections use Phillips or flat head screws. Have wire strippers ready to remove insulation from wires. Needle nose pliers help you grip small connectors and wires.
Heat shrink tubing is critical for any splice repair. This protects bare wire connections from moisture and corrosion. Keep electrical tape on hand as backup protection.
Safety Steps Before Starting
Always disconnect your car battery first. This stops electrical current from flowing through the circuits. Wait five minutes after disconnection to let power drain completely.
Wear safety glasses to protect your eyes from dust and debris under the seat. Use gloves to keep your hands clean and protected from sharp edges.
Work in a well ventilated area. Never work inside a closed garage with the engine running.
Check Your Fuse Box Location
Locate your vehicle’s fuse box before you begin work. Most cars have a main fuse box under the hood and a secondary box inside the cabin. Your owner’s manual shows exactly where these are located.
Take a photo of your fuse box layout with your phone. This helps you remember which fuse controls your heated seat circuit. Label the fuse position clearly so you don’t forget it.
Step-by-Step: Diagnosing the Blown Fuse Problem
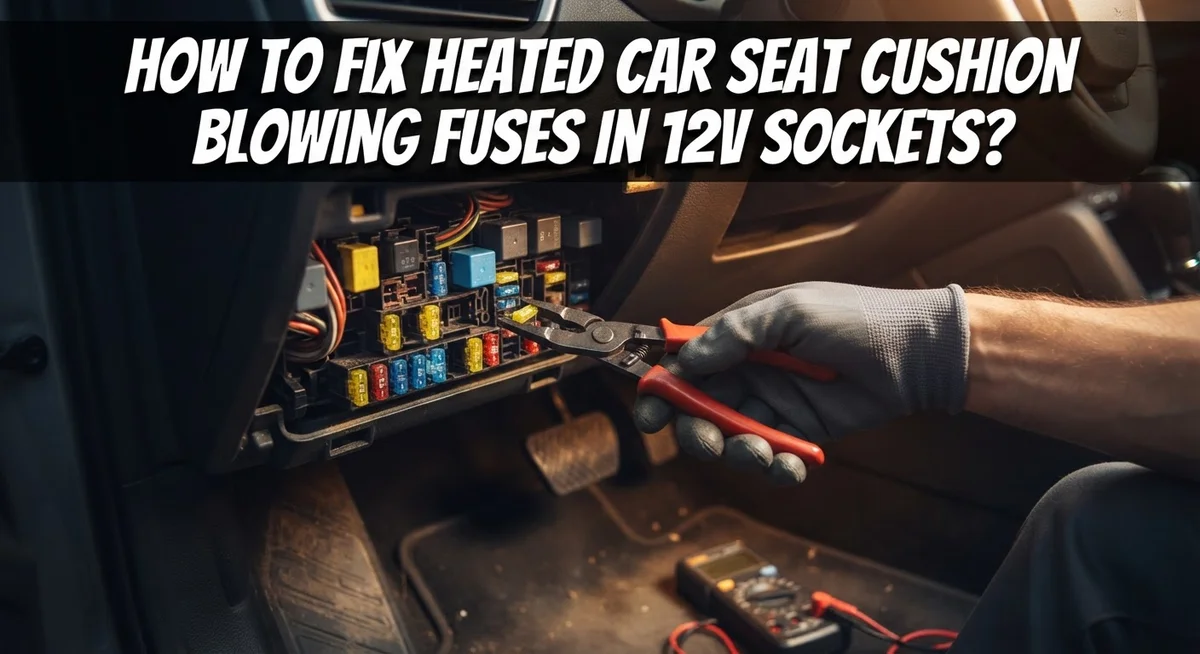
Start by locating your vehicle’s fuse box. Check your owner’s manual or look under the dashboard on the driver’s side. Most cars also have a fuse box under the hood near the battery. Take a clear photo of the fuse layout before you begin work.
Find the heated seat circuit fuse. Your manual will label which fuse controls the heated seats. The fuse is typically a small blade fuse rated between 10 to 20 amps. Write down the exact amperage you see printed on the fuse itself. This number matters because you must replace it with the same rating.
Pull the blown fuse straight out using a fuse puller tool or needle nose pliers. The fuse will look darkened or have a broken wire inside. Set it aside and examine it closely under good lighting. A working fuse shows a clear wire running through the center. A blown fuse shows a broken or melted wire.
Test your fuse box connections next. Look at the metal contacts where the fuse sits. Clean any corrosion or dirt using a dry cloth. Corroded contacts cause poor electrical flow and can trigger fuse failure.
Now comes the critical diagnostic step. Disconnect both seat heaters from the controller under your passenger seat. Reconnect the fuse and turn on your seat heater switch. If the fuse holds steady without the heat pads connected, your wiring is safe. The problem lives in either the heat pad itself or the controller unit.
If the fuse blows again even without the pads connected, you have a wiring fault. This means you need to trace the entire circuit for damaged insulation or loose connections. Document everything you find so you can explain the problem clearly to a technician if needed.
How to Isolate the Heat Pad or Controller as the Cause
The best way to find out whether your heat pad or controller is causing the problem is to disconnect them and test the circuit. This method saves you time and money by pinpointing the exact faulty component.
Start by locating your vehicle’s fuse box and identifying the heated seat circuit fuse. Take a photo of the layout so you can reference it later. Next, find where your seat heater controller sits, usually mounted under the passenger seat or driver seat area. You’ll see cables running from the controller to both seat heating pads.
Carefully disconnect both heating pads from the controller by unplugging the connectors. Make sure you remember which cable goes where so you can reconnect them correctly later. Now replace your blown fuse with a new one rated at the exact same amperage.
Turn on your car and test the heated seat switches without the pads connected. If the fuse holds steady and doesn’t blow, your wiring is fine and the problem lies in either the heat pad or controller itself. If the fuse blows again immediately, you have a wiring fault that needs professional attention.
This isolation test is incredibly valuable because it narrows down your repair options. A faulty heat pad means you need to replace that specific cushion component. A faulty controller means the control unit itself is damaged and requires replacement. Either way, you’ve eliminated wiring issues from the equation.
Document your findings by noting which component was disconnected when the fuse held. This information helps you move forward with confidence to the next repair step.
Step-by-Step: Replacing the Fuse Correctly
Once you’ve identified that your heat pad or controller is causing the problem, it’s time to replace the fuse correctly. This step is absolutely critical because using the wrong fuse rating can create a serious fire hazard in your vehicle.
Start by purchasing a replacement fuse with the exact same amperage rating as the blown one. Check your owner’s manual or the fuse box diagram to confirm the correct rating. Common heated seat fuses range from 10 to 20 amps, but your vehicle may differ. Never, under any circumstances, use a higher amperage fuse to prevent future blowing. This is a dangerous shortcut that can damage wiring and cause electrical fires.
Remove the blown fuse by gently pulling it straight out of its socket. Inspect the fuse box contacts where it sits. Look for any corrosion, burn marks, or loose connections. Clean the contacts gently with a dry cloth if you notice any discoloration.
Insert the new fuse firmly into the socket until you hear or feel it click into place. The fuse should sit flush and secure. Don’t force it, as this can damage the contacts.
Test your heated seats by turning on your car and activating the heat function. If the new fuse blows immediately, your problem lies in the heat pad or controller itself, not the fuse. If the fuse holds and your seats heat normally, you’ve solved the issue temporarily.
However, if fuses keep blowing repeatedly, consider installing a heavy-duty fuse holder as a permanent solution. This upgrade provides better protection and prevents the cycle from continuing. Your mechanic can help you install one safely.
Installing a Heavy-Duty Fuse Holder for a Permanent Fix
A heavy-duty fuse holder offers a lasting solution when standard fuses blow repeatedly in your heated seat circuit. This upgrade prevents constant fuse replacement and protects your electrical system from damage.
Why upgrade to a heavy-duty holder? Standard blade fuses have minimal resistance, which causes them to generate excessive heat during normal operation. A heavy-duty holder accommodates larger fuses designed to handle higher current flow without overheating. This keeps your heated seat system running without interruption.
Before installing a new holder, confirm your heat pad or controller is truly the problem. Disconnect both seat heaters from their controller and test the switches. If fuses don’t blow after disconnection, your wiring is safe. If they still blow, the heat pad or controller needs replacement instead.
To install a heavy-duty fuse holder, you’ll splice the charger cable directly into your existing wiring. Cut the wire leading to your heated seat circuit at a convenient location, typically under the seat. Strip about half an inch of insulation from each cut end.
Connect the charger cable to both wire ends using crimp connectors. Slide heat shrink tubing over each connection point and apply heat with a heat gun or lighter. The tubing shrinks tight, sealing and protecting the splice from moisture and corrosion.
Mount your new fuse holder in an accessible location. Secure it with zip ties or mounting brackets to prevent movement. Use the same amperage rating as your original fuse. Never install a higher amperage fuse, as this creates a fire hazard.
Test your heated seats once installation is complete. The system should operate smoothly without blowing fuses repeatedly.
Common Mistakes to Avoid When Fixing Blown Fuses
Many people make costly mistakes when fixing blown fuses in heated seat systems. Understanding these errors helps you avoid damage to your vehicle and potential safety hazards.
The biggest mistake is using a higher amperage fuse than the original. Your owner’s manual specifies the correct amperage for a reason. A 20 amp fuse where a 15 amp fuse belongs creates a serious fire risk. The higher rating allows excessive current to flow through your wiring before the fuse blows. This heat can melt wire insulation and cause electrical fires. Always match the exact amperage rating of the blown fuse.
Another common error is making improper splice connections without protective covering. When you splice wires together, you must secure them with heat shrink tubing or electrical tape. Bare connections expose your wiring to moisture and corrosion. This leads to poor electrical contact and future fuse failures. Take time to seal every splice properly.
Many people also fail to isolate the problem before replacing components. They swap out fuses or install new holders without testing whether the heat pad or controller is actually faulty. This wastes money and time. Always disconnect the heating pads and test your switches first. If fuses hold after disconnection, your wiring is fine. The problem lies in the heat pad or controller itself.
Rushing through diagnostics causes the most frustration. Spend extra time identifying the exact source of your fuse blowing. Document which components you disconnected and when the fuse held. This information guides your repair path and prevents repeating the same mistakes. Patience during diagnosis saves you money and keeps your vehicle safe.
Troubleshooting Recurring Fuse Blowouts
When your heated car seat cushion keeps blowing fuses, you need a systematic approach to find the real problem. Recurring fuse blowouts signal a deeper issue that won’t go away by simply replacing fuses over and over.
Start by locating your vehicle’s fuse box. Check your owner’s manual to identify which fuse controls the heated seat circuit. Write down the amperage rating on the blown fuse before you remove it.
Next, disconnect both seat heaters from their controller. This controller usually sits under the passenger seat. Once disconnected, turn on your car and test the switches without the heat pads connected.
Here’s the key part: if fuses don’t blow after you disconnect the heaters, your wiring is fine. The problem lives in either the heat pad itself or the controller unit. If fuses still blow even without the pads connected, you have a wiring fault that needs professional attention.
Test each component separately to narrow down the culprit. Reconnect just the driver’s seat heater first and see if the fuse blows. Then test the passenger side heater alone. This tells you exactly which component is causing trouble.
Many people skip this diagnostic step and waste money replacing parts that work fine. Take your time here because you’re gathering information that guides your repair decision.
Once you confirm whether the problem is your heat pad, controller, or wiring, you can decide on the best fix. Some issues need component replacement. Others benefit from upgrading to a heavy-duty fuse holder setup. Proper diagnosis saves you time and money on repairs.
Final Thoughts
Fixing a heated car seat cushion that blows fuses does not need to be hard. You just need a clear plan.
Start with proper diagnosis before you touch any parts. Disconnect the heaters and test your switches first. This simple step saves you time and money.
Most fuse problems trace back to two things. Either the heat pad has failed or the controller has a fault. Wiring issues are less common than people think.
Always match your replacement fuse to the original amperage rating. Never install a higher rated fuse to stop the blowing. This creates a real fire risk in your vehicle.
If fuses keep blowing after correct diagnosis, a heavy-duty fuse holder gives you a lasting fix. It handles heat better than standard blade fuses.
Take your time with each repair step. Rushing through splices or connections leads to more problems later. Use heat shrink tubing on every connection you make.
Remember that a blown fuse under your driver seat is often a normal warning sign. Your car is protecting itself from damage.
Test your repairs before you drive away. Turn on your heated seats and watch for a few minutes. This confirms your fix actually works.
Keep spare fuses of the correct rating in your car. This helps if the problem returns before you find a permanent solution.
Patience and proper testing solve most heated seat fuse problems. Skip shortcuts and follow each step in order. Your heated seats will work safely again, and you avoid costly repeat repairs down the road.
Frequently Asked Questions
Why does my heated seat keep blowing the same fuse?
Your heat pad or controller is likely drawing too much electrical current. This causes the fuse to overheat and break the circuit. The fuse is actually doing its job by protecting your car’s wiring from fire danger.
Disconnect both seat heaters from the controller to test if the problem is in the heating element itself or the wiring. If fuses stop blowing after disconnection, your wiring is safe. The issue lives in the heat pad or controller unit.
Can I use a higher amperage fuse to stop the blowing?
No. Never use a higher amperage fuse than your original. This creates a serious fire hazard in your vehicle.
A higher rated fuse won’t trip when it should. Your wiring could overheat and catch fire. Always match the exact amperage rating stamped on your old fuse. If you’re unsure, check your owner’s manual or fuse box diagram.
What’s the permanent fix for recurring blown fuses?
Install a heavy duty fuse holder as your long term solution. This upgrade handles the electrical load better than standard blade fuses. Splice the charger cable into your circuit and secure connections with heat shrink tubing.
This prevents the constant cycle of blown fuses. Many car owners find this fix stops the problem completely. The heavy duty holder absorbs heat better and maintains better electrical contact.
Is a blown fuse under the driver seat normal?
Yes, this is actually a common warning sign. Your vehicle is telling you the heating system needs attention. Don’t ignore it, but know that it’s your car protecting itself from electrical damage.
Address the root cause through proper diagnosis rather than repeatedly replacing fuses.

Hi, I’m Rue Hessel, the founder and voice behind TheGenTool. I’m a passionate tech enthusiast who loves exploring the latest gadgets, smart devices, and electronics that shape our everyday lives. Through my website, I share honest, hands-on reviews of trending Amazon products to help you make smarter and more confident buying decisions.