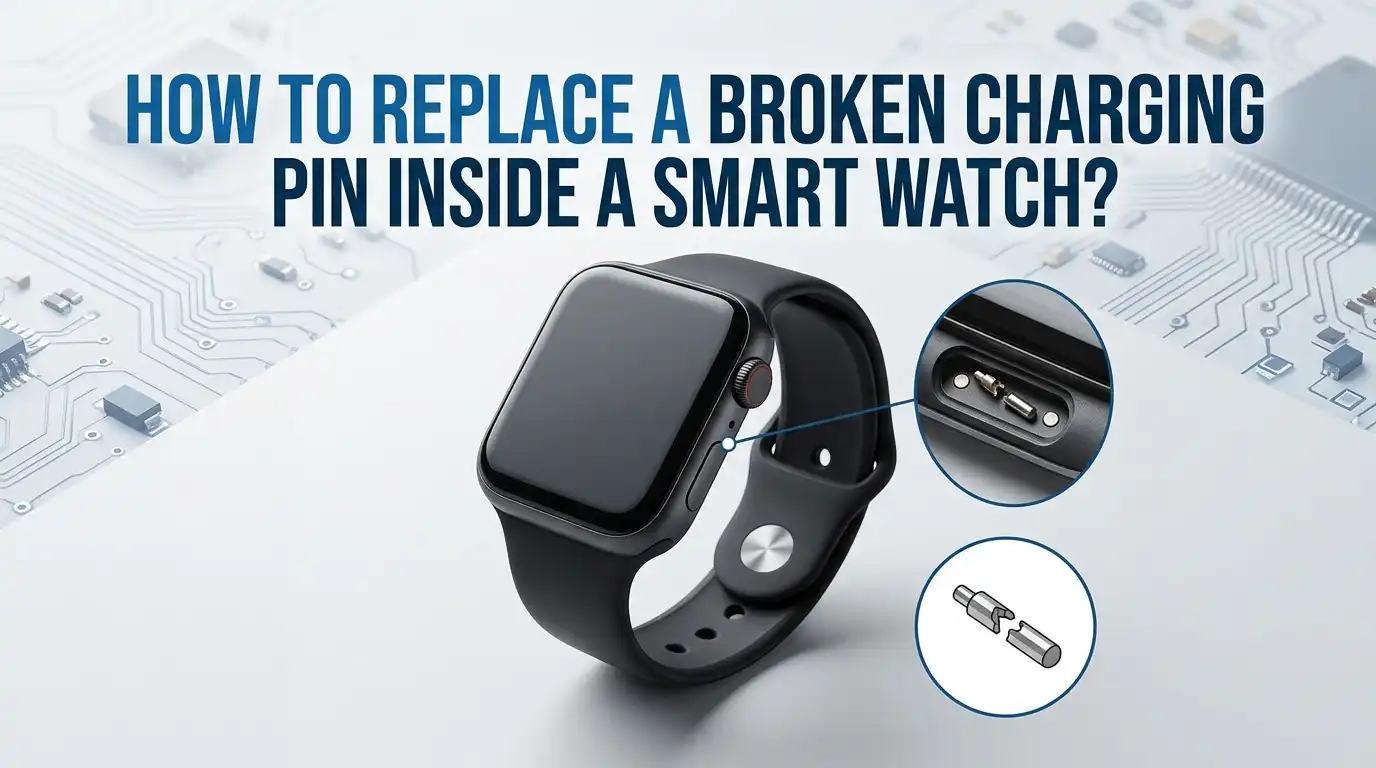
How to Replace a Broken Charging Pin Inside a Smart Watch?
Your smart watch refuses to charge. You flip it over and spot the problem right away. A tiny pin inside the charging port looks bent, snapped, or completely missing.
That small piece of metal controls every charging session, and when it breaks, your watch becomes dead weight on your wrist.
The good news is simple. You can fix this at home with patience and the right tools. Most charging pins, called pogo pins, are replaceable parts.
In a Nutshell
- Broken charging pins are common in smart watches. Daily wear, sweat, dust, and rough handling push the small spring loaded pins out of place. Most watches use pogo pins on the back case, and these pins press against the magnetic charger.
- You need basic electronics tools. A small Phillips screwdriver, plastic pry tools, tweezers, a soldering iron with a fine tip, replacement pogo pins, and isopropyl alcohol cover most jobs.
- The repair has three stages. First, you open the watch case. Second, you remove the damaged pin from the board or back cover. Third, you solder or press fit a new pin and reseal the watch.
- Soldering skills matter. If you have never used a soldering iron, practice on scrap electronics before touching your watch board. One slip can damage nearby components.
- Sealing the watch is critical. Most smart watches carry an IP rating for water resistance. After the repair, you must reapply gasket adhesive or waterproof tape to keep the seal intact.
- Professional repair stays an option. If the board pads are damaged or the watch is glued shut, a repair shop can save the device for a small fee.
Why Charging Pins Break in the First Place
Charging pins live a hard life. They sit on the back of your watch and touch metal contacts on the charger many times each week. Every connection wears the tip down a little. Over months, the spring inside the pin weakens or the pin head bends sideways.
Three main causes lead to broken pins. Sweat and moisture corrode the metal, especially after workouts. Dust and lint trap inside the pin housing and block the spring from moving. Pulling the charger off at an angle snaps the head clean off in many cases.
Knowing the cause helps you protect the new pin later. Clean your watch back every week. Dry it after exercise. Pull the charger straight up, not sideways. These small habits add years to the next pin.
Signs Your Charging Pin Is the Real Problem
Before you open the watch, confirm the pin is the culprit. A dead battery, a bad cable, or a faulty charger can mimic the same symptoms. Skipping this step wastes hours.
Look at the back of the watch under bright light. A healthy pogo pin sits flush or slightly raised, with a smooth round tip. A broken pin looks flat, sunken, tilted, or shows green corrosion. Press each pin lightly with a toothpick. A good pin springs back. A dead pin stays pushed in.
Next, test the charger on another compatible watch if you own one. Try a different cable on your watch. If the watch still refuses to charge after these swaps, the pin is almost certainly the issue. A multimeter on the pin contact during charging confirms the diagnosis.
Pros of this check: It saves you from opening a healthy watch.
Cons: It needs basic tools like a multimeter, and visual signs can be subtle on small pins.
Tools and Parts You Need for the Repair
Gather everything before you start. Stopping mid repair to search for a tool often leads to lost screws or scratched cases.
You need a precision screwdriver set with Phillips and Torx bits, plastic spudgers or guitar picks for prying, fine tweezers, a soldering iron rated between 25 and 40 watts, lead free solder, flux paste, desoldering wick, and isopropyl alcohol at 90 percent or higher. A magnifying glass or USB microscope helps a lot. Pin sizes vary, so order the exact replacement pin that matches your watch model.
For sealing, buy a roll of thin waterproof adhesive tape or a small tube of B7000 glue. A heat gun or hair dryer softens factory adhesive on glued cases. Lay everything on a clean, well lit workspace with a soft cloth to catch tiny screws.
How to Identify the Exact Pin Type for Your Watch
Pogo pins come in many sizes. Using the wrong size means the new pin will not touch the charger contacts properly. Most smart watches use two pin or four pin layouts with diameters between one and two millimeters.
Search online for your watch model plus the words charging pin replacement or pogo pin spec. Manufacturer forums, iFixit teardowns, and repair communities often list exact measurements. If you cannot find specs, measure the broken pin with digital calipers. Note the diameter, total length, and travel distance of the spring.
Order at least two or three spare pins. Tiny parts roll off tables and vanish forever. Some sellers offer universal pin kits with mixed sizes, which work well if you repair watches often.
Pros: Buying the exact pin guarantees a clean fit.
Cons: Rare watch models may have proprietary pins that are hard to source.
Opening the Smart Watch Case Without Damage
This step scares most people, and for good reason. Smart watch cases use either small screws, adhesive seals, or a press fit back. Identify your type before you push or pry.
For screw down backs, remove every screw with the matching driver. Place screws on a magnetic mat in the order you removed them. For glued backs, warm the edges with a hair dryer for two minutes at low heat. The adhesive softens around sixty degrees Celsius. Slide a thin guitar pick under the seam and work it around the case slowly.
Never force the back open. If it resists, apply more heat. Inside, you will see a thin ribbon cable connecting the back cover to the main board on many models. Disconnect it gently with tweezers before lifting the cover fully.
Locating the Broken Pin Inside the Watch
Once open, you see the battery, main board, and the inside of the back cover. The charging pins usually mount on the back cover itself, with spring contacts that touch pads on the main board. Some watches solder the pins directly to the board through small holes.
Inspect the pin from inside. Look for a small brass or gold colored cylinder with a wire or solder joint at its base. Take a clear photo before you touch anything. This photo helps you reassemble the parts later.
Check for surrounding damage. Burned spots, lifted pads, or melted plastic mean the pin shorted at some point. If you see heavy damage, the repair may need extra steps like jumper wires.
Removing the Damaged Pin Safely
Heat your soldering iron to around 300 degrees Celsius. Add a small dab of fresh solder to the old joint. Fresh solder mixes with the old solder and lowers the melting point.
Place desoldering wick over the joint and press the iron tip on top. The wick absorbs the molten solder in a few seconds. Repeat until the pin base is free of solder. Grip the pin with tweezers and pull it straight out. If it sticks, add more flux and reheat.
Clean the pad with isopropyl alcohol and a cotton swab. A clean pad ensures the new pin bonds properly. Inspect under magnification for any lifted copper traces. A lifted trace needs a jumper wire to restore the connection.
Pros of this method: It removes the pin without harming the board.
Cons: It needs steady hands and real soldering practice.
Installing the New Charging Pin
Place the new pogo pin into the same hole or pad. Make sure the spring side faces outward, toward the charger contact. Hold the pin straight with tweezers or a small clamp.
Touch the soldering iron to the pin base while feeding a tiny amount of solder. The joint should look shiny, smooth, and cone shaped, not dull or lumpy. A dull joint means a cold solder and weak connection. Reheat and add flux if needed.
Check the pin alignment. It must sit at the same height as the other pins so all of them touch the charger evenly. Move the spring up and down with a toothpick to confirm smooth travel.
Pros: A fresh solder joint restores full charging speed.
Cons: Misalignment causes intermittent charging that frustrates users later.
Testing the Repair Before Sealing the Case
Do not glue or screw the watch back together yet. Testing first saves you from opening it a second time.
Reconnect the ribbon cable between the back cover and the main board. Hold the watch in place without sealing it. Plug in the charger and check for the charging icon on the screen. A green light or vibration also confirms success on many models.
Leave it charging for ten minutes. Touch the area around the pin. Warm is normal. Hot means a short, and you must unplug immediately. If charging works steadily, the repair is solid.
Pros of testing first: You catch mistakes early.
Cons: Loose parts during testing can short out if you are careless.
Sealing the Watch and Restoring Water Resistance
A working pin means nothing if water ruins the board next week. Smart watches rely on a thin gasket or adhesive ring to stay sealed.
Scrape off old adhesive with a plastic tool. Clean both surfaces with alcohol. Apply a thin, even bead of B7000 glue or a precut waterproof tape ring around the case edge. Press the back cover down and hold it with clamps or rubber bands for at least four hours.
For screw down models, replace the rubber O ring if it looks flat or cracked. A fresh O ring costs almost nothing and restores most of the original water resistance. Avoid swimming with a repaired watch for at least a week.
Common Mistakes to Avoid During the Repair
Even careful people slip up on small jobs like this. Knowing the traps helps you dodge them.
The top mistake is overheating the board. Holding the iron on a pad for more than four seconds lifts the copper trace. Once a trace lifts, the repair gets much harder. Use quick, light touches with plenty of flux.
Another common error is forcing the back cover. Cracked cases never seal properly again. Always heat glued backs and unscrew threaded backs fully before lifting.
Finally, people often skip the alignment check. A pin that sits one millimeter too low never touches the charger. Test before sealing every single time.
When to Call a Professional Repair Shop
Some repairs go beyond DIY. Be honest about your skill level before you ruin a watch.
Call a pro if the pads on the main board are missing, if the battery is swollen, or if the watch case is sealed with ultrasonic welding instead of glue. Repair shops have hot air stations, microscopes, and donor boards that hobbyists rarely own. Most charging pin repairs at a shop cost between fifteen and forty dollars.
Compare that cost to a new watch. If your model costs over one hundred dollars, the repair is almost always worth it. Cheaper watches sometimes make more sense to replace.
Pros of professional repair: Higher success rate and warranty on parts.
Cons: Costs more than DIY and takes a few days.
How to Prevent Future Charging Pin Damage
Prevention beats repair every time. A few habits keep the new pin healthy for years.
Wipe the back of your watch with a dry cloth every night. Never charge a sweaty watch right after exercise. Let it air dry for ten minutes first. Store the charger flat so the magnet does not collect metal dust.
Pull the charger off by holding the cable base, not the watch body. Sideways pulls strain the pin spring. If your charger uses a clip, open the clip fully before removing it.
Check the pins once a month under good light. Early signs of corrosion clean off easily with a cotton swab dipped in alcohol. Catching damage early avoids a full repair later.
FAQs
How much does it cost to replace a charging pin in a smart watch at home?
The full DIY cost stays between five and twenty dollars. Replacement pogo pins cost one to three dollars each. Soldering supplies cost more upfront but last for many repairs. Compared to a forty dollar shop fee or a new watch, home repair saves real money.
Can I fix a bent pin without replacing it?
Yes, sometimes. Use fine tweezers or a toothpick to gently straighten the pin head. If the pin still springs back and the tip is smooth, the watch may charge again. A pin with a snapped head or a stuck spring needs full replacement.
Will replacing the pin void my warranty?
In most cases, yes. Opening the watch case breaks the manufacturer seal and voids the warranty. Check your warranty status before you start. If the watch is still under warranty, contact the maker first for a free or low cost repair.
How long does the repair take for a beginner?
Plan for two to three hours. First timers spend most of the time opening the case and getting the soldering right. Experienced hobbyists finish the same job in thirty minutes. Do not rush, especially during soldering and sealing.
Is my watch still waterproof after the repair?
Only if you reseal it properly. A new gasket, fresh adhesive, and careful pressing restore most of the original rating. Avoid swimming or hot showers for at least a week. Test water resistance with a damp cloth first, never by submerging the watch.
What if the watch still does not charge after the repair?
Recheck the solder joint under magnification. A cold or cracked joint causes most failures. If the joint looks fine, the problem may be a damaged trace, a bad battery, or a failed charging chip on the board. At that point, professional help is the smart next step.

Hi, I’m Rue Hessel, the founder and voice behind TheGenTool. I’m a passionate tech enthusiast who loves exploring the latest gadgets, smart devices, and electronics that shape our everyday lives. Through my website, I share honest, hands-on reviews of trending Amazon products to help you make smarter and more confident buying decisions.