How To Fix Robotic Window Cleaner Safety Tether Fraying?
Your robotic window cleaner works hard to keep your glass spotless. But have you checked its safety tether lately?
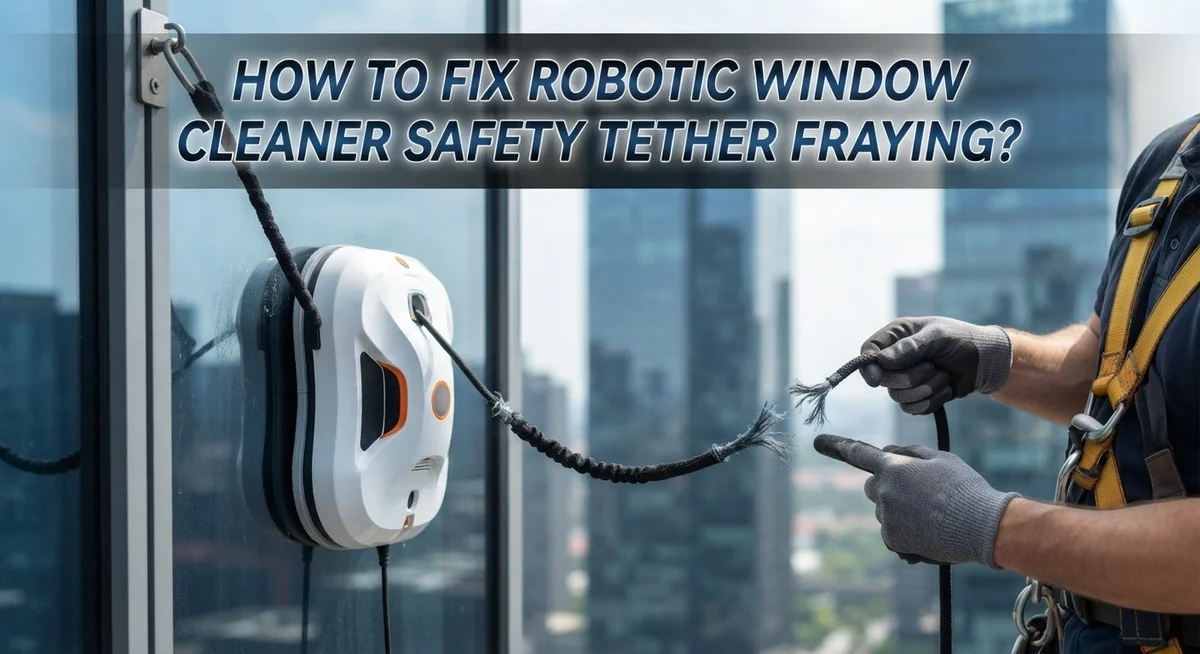
That thin cord does a big job. It stops your robot from falling off the window during operation. Over time, though, it can wear down and fray.
A frayed tether is not something to ignore. It puts your device at risk. It also puts anyone below the window at risk too.
The good news is that fixing this problem is simple. You just need to know what to look for and what steps to take.
In a Nutshell
- Check your tether before every single use. Look closely for frayed spots, cuts, or thin areas along the cord.
- Secure the tether to something heavy. A solid piece of furniture or a fixed anchor works best to stop falls.
- Replace the tether once you spot damage. A frayed tether cannot protect your robot properly anymore.
- Turn on the auto-lock safety feature if your robot has one. This adds an extra layer of protection during cleaning.
- Use a Safety Pod as backup support. This device catches your robot if the tether ever fails.
- Swap out the microfiber pad often. A worn pad can cause streaks and even strain the tether during operation.
- Apply cleaning solution the right way. Stick to 2 to 5 sprays on the pad edges only, and skip excess soap.
Understanding the Safety Tether and Why Fraying Happens
Your robotic window cleaner relies on a safety tether to stay secure while working on high windows. This cord is the primary barrier between your robot and a dangerous fall. Understanding what this tether does helps you recognize why fraying is a serious issue.
The safety tether is a durable cord that anchors your robot to a fixed point. You attach one end to your robot and the other end to heavy furniture or a wall anchor. As your robot moves across the glass, the tether moves with it. If the suction cups fail or the robot loses grip, the tether catches it and prevents a fall to the ground.
Fraying happens when the cord’s outer fibers start to separate and unravel. This occurs from regular use, friction against sharp edges, or exposure to sunlight and weather. The tether rubs against window frames, building edges, and rough surfaces during operation. Over time, these contact points wear away the protective outer layer.
Why fraying matters is simple. A frayed tether loses strength where the fibers separate. The weakened section cannot hold your robot’s full weight if a fall occurs. What started as minor fraying can become a complete break during an actual emergency.
Moisture also speeds up fraying. Water seeps into the separated fibers and weakens the cord from the inside. Temperature changes cause the material to expand and contract, making existing frays worse.
The key is catching fraying early. Before each use, run your fingers along the entire length of the tether. Feel for rough spots, bumps, or loose fibers sticking out. Look for discolored areas that signal damage. A tether in good condition feels smooth and looks uniform in color.
Regular inspection takes just two minutes but protects your expensive robot and keeps you safe. Catching fraying at the start means you can fix it before the problem becomes dangerous.
How to Inspect Your Tether for Fraying and Damage
Inspecting your tether regularly keeps your robot safe and working well. Start by looking at the entire length of the cord before each cleaning session. Run your fingers along it slowly to feel for rough spots, bumps, or areas where fibers stick out.
Look for these specific signs of damage. Frayed ends mean the outer coating is breaking down. Thin sections show the cord is wearing out. Discolored areas might indicate moisture damage or sun exposure. Small cuts or nicks can grow into bigger problems fast.
Check the attachment points carefully. The tether connects to your robot at one end and to your anchor point at the other. These connection areas take the most stress. Make sure the cord sits tight in the clips or fasteners. Loose connections can cause the tether to slip during operation.
Examine the tether under good lighting. Natural sunlight works best because it shows small damage you might miss indoors. Hold the cord up to a window and look for thin spots where light passes through easily. These weak areas need replacement soon.
Pay attention to the tether’s flexibility too. A healthy cord bends smoothly without cracking sounds. If your tether feels stiff or makes snapping noises when you bend it, the fibers are breaking inside. This means replacement time is near.
Document what you find. Take a quick photo if you spot damage. This helps you track how fast the tether is wearing out. If damage appears suddenly, something might be wrong with how you are anchoring the robot.
Test the tether’s grip strength. Hold it firmly and pull with steady pressure. It should not slip or feel loose in your hands. A secure grip means the attachment points are working correctly and keeping your robot safe during window cleaning sessions.
Step-by-Step: Fixing or Replacing a Frayed Safety Tether
Once you spot fraying, you have two main options: repair the damaged section or replace the entire tether. The choice depends on how severe the damage is and where the fraying occurs.
For minor fraying at the edges, you can seal the fibers to stop further unraveling. Clean the frayed area first with a dry cloth. Then apply a thin layer of clear fabric glue or thread sealant along the damaged spot. Let it dry completely before using the robot again. This method works best for small frays near the tether’s end.
For fraying closer to the middle of the tether or along attachment points, replacement is safer. A compromised tether in these areas cannot hold your robot reliably. Order a replacement tether that matches your robot’s specifications exactly.
To replace the tether, first disconnect it from both the robot and the anchor point. Most tethers attach with simple knots or clips that you can untie or unclip by hand. Remove the old tether completely. Thread the new tether through the same attachment points on your robot. Secure it firmly at both ends using the same method the original used.
Test the new tether’s strength before operating on a high window. Pull it hard to confirm the knots hold tight. Check that the connection points feel solid and don’t wiggle.
Keep a spare tether on hand if your robot is expensive or you use it frequently. This prevents downtime if damage occurs unexpectedly.
After installing a new tether or sealing frayed spots, inspect it again before your next cleaning session. Even repaired tethers need regular monitoring. Replace the tether every two to three years as routine maintenance, even if no visible damage appears. This keeps your robot safe and extends its working life.
Setting Up the Anchor and Safety Pod Backup System
Setting up a proper anchor and safety pod backup system is essential for protecting your robotic window cleaner. This two layer approach keeps your robot secure even if one system fails.
Start with a sturdy anchor point. Choose a heavy object that won’t move, like a furniture piece bolted to the floor or a permanent fixture. The anchor must support at least ten times your robot’s weight. Test the anchor by pulling hard on the safety tether before you begin cleaning. If it shifts or slides, find a different location.
Secure the tether to your anchor using a reliable knot or attachment method. The connection point should be at least three feet above your robot’s starting position. This height gives the tether room to catch your robot if it falls. Check that the tether doesn’t wrap around sharp edges or corners that could cut the cord.
Now add your Safety Pod as backup protection. The Safety Pod is a catching device that sits below your robot’s work area. It acts as a safety net if the tether ever fails. Position the pod directly beneath the window you’re cleaning. Make sure nothing blocks the pod’s opening.
Test both systems together before operating on high windows. Lower your robot slowly while watching the tether and pod. The tether should stay taut but not overly tight. Your robot should move smoothly without jerking or catching.
Inspect your anchor connection before each cleaning session. Verify the tether is firmly attached and shows no signs of fraying at the attachment point. Check that your Safety Pod is in good condition and positioned correctly.
Keep backup equipment nearby. Store an extra tether and replacement Safety Pod in your cleaning kit. This ensures you can respond quickly if damage occurs during operation.
Best Practices to Prevent Future Tether Wear
The best way to keep your tether safe is to stop problems before they start. Prevention saves you time, money, and headaches down the road.
Store your tether properly after each use. Coil it loosely and keep it in a cool, dry place away from direct sunlight. Heat and UV rays break down the material over time. Never leave your tether tangled or twisted in a knot, as this creates stress points that fray easily.
Rotate between multiple tethers if you clean windows frequently. This spreads out the wear and lets each tether rest between uses. One tether handles all the strain when you use it daily, but two or three tethers share the load and last much longer.
Avoid dragging your tether across rough surfaces. Sharp edges on window frames, brick, or stucco can cut the fibers. Always guide the tether away from abrasive areas during operation. Keep it loose enough to move freely without getting pinched or caught.
Check your anchor point regularly too. A loose or shifting anchor creates jerking motions that stress the tether. Make sure your anchor stays secure and doesn’t move when you tug on it.
Clean your tether occasionally with mild soap and water. Dirt buildup can trap moisture and weaken the fibers. Pat it dry completely before storing it away.
Inspect the attachment points monthly. These connection spots experience the most stress. Look for any looseness or small tears starting to form. Tighten connections if needed and replace the tether if damage appears near the ends.
Keep your robot’s weight within recommended limits. An overloaded robot puts extra tension on the tether. Follow the manufacturer’s guidelines for your specific model.
These simple habits extend your tether’s life significantly. You’ll avoid emergency replacements and keep your window cleaning safe and reliable.
Common Mistakes That Accelerate Tether Fraying
Many people make simple mistakes that speed up tether fraying. Understanding these errors helps you protect your safety equipment.
Failing to inspect before use is the biggest mistake. You should check your tether every single time you operate the robot. Look for loose strands, thin spots, or visible damage. Many users skip this step and don’t notice fraying until it becomes serious.
Using a damaged tether anyway is dangerous. Some people think minor fraying won’t matter. The truth is that small damage spreads quickly. A tether with even slight fraying loses strength fast. You must replace or repair it immediately.
Over applying cleaning solution causes unexpected problems. Excess soap drips onto your tether during operation. The solution soaks into the fibers and weakens them. It also makes the tether slippery, which increases stress on attachment points. Use only the recommended amount of solution on your microfiber pad.
Improper storage accelerates wear. Coiling your tether too tightly creates kinks and stress points. Leaving it in direct sunlight damages the material. Heat and UV rays break down the fibers over time. Store your tether loosely in a cool, dark place instead.
Dragging the tether across rough surfaces causes cuts and fraying. Window frames, brick edges, and stucco all have sharp points. When you pull your tether across these surfaces, the fibers get damaged. Guide your tether carefully during operation to avoid contact with rough areas.
Neglecting attachment points leads to concentrated wear. The spots where your tether connects to the robot and anchor experience the most stress. If these connections are loose or misaligned, fraying starts there first. Check these areas monthly for signs of damage or looseness.
Avoiding these mistakes keeps your tether strong and your cleaning sessions safe.
Troubleshooting Related Issues: Streaking, Pad Wear, and Loose Tethers
When your safety tether starts to fray, the first step is understanding what causes this damage. Fraying happens when the outer fibers of your tether separate and unravel. This usually occurs from friction against rough surfaces or repeated bending at stress points.
Inspect the frayed area carefully before deciding on your next move. Look at where the fraying starts and how far it extends along the tether. Minor fraying at the edges may only need trimming, while extensive damage means you need to replace the entire tether.
For light fraying, you can trim the loose fibers with sharp scissors. Cut them as close to the main tether body as possible. After trimming, apply a small amount of clear sealant to the cut edge. This prevents the remaining fibers from unraveling further.
Check if fraying affects the tether’s strength. Run your fingers along the damaged section. If the core feels intact and holds firm, the tether may still work safely. If you feel soft spots or the tether feels weak, replacement is necessary.
Prevent future fraying by protecting your tether during operation. Keep it away from sharp window frame edges and rough building materials. Guide the tether smoothly along clean surfaces whenever possible.
Store your tether properly after each use. Coil it loosely without tight knots or kinks. Tight storage positions stress the fibers and cause premature fraying.
Monitor attachment points closely. These connection spots experience the most tension and often fray first. Check them before every cleaning session. If you notice fraying starting at these stress points, consider replacing the tether soon.
Regular inspection catches fraying early. This gives you time to repair minor damage or order a replacement before your tether fails completely. Never ignore visible fraying, as it directly affects your robot’s safety during window cleaning work.
Final Thoughts
A frayed safety tether is not something to ignore. It protects your robotic window cleaner from falling and breaking during operation.
Fixing fraying early saves you money and stress. A small repair now stops a bigger problem later.
Always check your tether before every cleaning session. This simple habit catches fraying before it becomes dangerous.
If the fraying is minor, trim the loose fibers carefully. Test the tether’s strength afterward by pulling gently along its length.
If the tether feels weak or the fraying runs deep, replace it right away. Never risk using a compromised tether, even for a quick cleaning job.
Remember that your tether works alongside other safety features. The Safety Pod acts as a backup if the tether ever fails.
Secure your robot to a heavy anchor point every time you clean. This step matters just as much as tether care itself.
Keep your microfiber pads clean and fresh too. Worn pads can affect how your robot moves, which puts extra strain on the tether.
Apply cleaning solution sparingly. Too much soap creates residue that affects performance and adds unnecessary stress to your equipment.
Good habits protect your robot, your windows, and your peace of mind. Regular checks take just a few minutes but prevent costly accidents.
Think of tether care as part of your regular cleaning routine. It should feel as normal as charging your robot or wiping down the pads.
Safety always comes first when using any robotic window cleaner. A well maintained tether means safer, smoother cleaning every time.
Stay consistent with inspections, storage, and gentle handling. Your tether will last longer, and your robot will stay secure high above the ground.
With the right care, you can enjoy clean windows without worry. A little attention today keeps your equipment safe for many cleanings ahead.
Frequently Asked Questions
Why does my safety tether fray in the first place?
Safety tethers fray because they experience constant tension during cleaning sessions. The tether rubs against window edges, building corners, and anchor points. This friction wears down the outer fibers over time. Rough surfaces cause the most damage. Improper storage and dragging the tether across sharp objects accelerate fraying significantly.
Can I still use my robot if the tether has minor fraying?
Minor fraying at the edges is usually safe to use. Check the tether’s core strength by running your fingers along the damaged area. If the core feels solid and intact, light fraying won’t compromise safety. However, trim loose fibers with sharp scissors to prevent them from catching on objects. Inspect the tether again before your next cleaning session.
What’s the difference between repairing and replacing a frayed tether?
Light fraying only needs trimming and monitoring. Deep fraying or damage that runs through the tether’s core requires replacement. If the tether feels weak, limp, or shows visible damage beyond the surface fibers, replacement is your safest option. A compromised tether cannot protect your robot from falling.
How do I prevent fraying from happening again?
Store your tether loosely in a cool, dry place after each use. Never wrap it tightly or leave it coiled in direct sunlight. Secure your robot to a heavy anchor point before operation. Guide the tether away from sharp edges and rough surfaces during cleaning. Inspect the attachment points regularly since they experience the most stress and tension.

Hi, I’m Rue Hessel, the founder and voice behind TheGenTool. I’m a passionate tech enthusiast who loves exploring the latest gadgets, smart devices, and electronics that shape our everyday lives. Through my website, I share honest, hands-on reviews of trending Amazon products to help you make smarter and more confident buying decisions.