How To Fix Smart Mug Coaster Charging Pin Retracting And Sticking Issues?
Your smart mug coaster keeps your coffee warm all day. But what happens when the charging pins get stuck and refuse to work?
This is a common problem. The pins on your coaster can retract or stick in the “down” position. When this happens, your mug stops charging completely.
Debris buildup is usually the main culprit. Dust, spilled coffee, or crumbs can get inside the pin mechanism. Sometimes, the pins simply break down mechanically over time.
In a Nutshell
- Unplug first. Always disconnect the coaster from its power adapter before you touch the pins. This keeps you and the device safe.
- Use tweezers gently. Pull the stuck pins back to their upright position. Slow and steady movements work best here.
- Clean with alcohol. Isopropyl alcohol dissolves the grime causing the sticking. Move the pins up and down to work the alcohol into the mechanism.
- Broken pins need extraction. If a pin snaps, you will need to remove it carefully with a knife.
- Crimping offers a lasting fix. Long-nose pliers can crimp the pin in place, stopping future retraction. This method tends to last longer than simple cleaning.
- Prevention helps, but isn’t foolproof. Wiping the mug base and coaster contacts often reduces buildup. Even so, this issue can still return over time.
Understanding Why Charging Pins Retract And Stick
Smart mug coaster pins retract and stick for specific reasons. Understanding these causes helps you fix the problem faster and prevent it from happening again.
Debris buildup is the primary culprit. Your mug sits on the coaster daily. Dust, coffee residue, and mineral deposits accumulate on both the mug’s bottom and the coaster’s metal contacts. This buildup creates friction that forces pins downward and keeps them stuck in the retracted position.
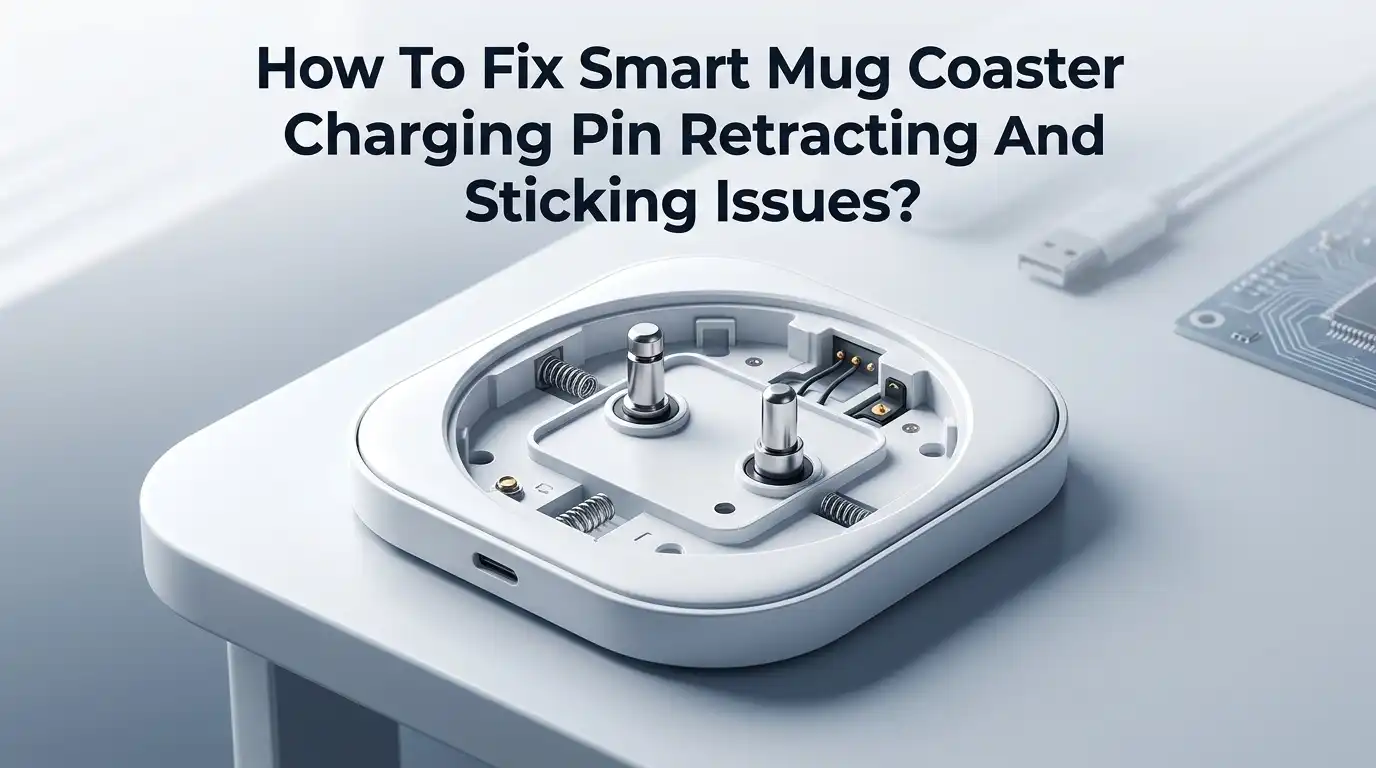
The pins themselves have a spring mechanism designed to push upward. When debris collects around the pin shaft, this mechanism fails. The spring loses its ability to extend the pins fully, leaving them trapped below the coaster surface.
Moisture also contributes to the problem. Coffee spills happen. Water droplets seep into the coaster’s interior and cause oxidation on metal contacts. This corrosion increases friction dramatically, making pins even harder to move.
Mechanical wear occurs over time too. Every time you place your mug on the coaster, the pins move up and down. Repeated use weakens the spring tension gradually. Eventually, the springs lose enough force that pins can’t push back up against accumulated resistance.
Some pins actually break internally. If you notice a pin won’t move at all despite gentle pressure, the spring mechanism may have snapped. A broken pin cannot retract or extend properly, leaving your mug unable to charge.
Temperature changes affect the coaster’s materials. Metal expands and contracts with heat and cold. This constant expansion and contraction can loosen internal components and misalign the pin mechanisms.
The good news? Most of these issues are fixable at home. Cleaning removes debris and corrosion. Gentle repositioning restores spring function. For truly broken pins, extraction and crimping offer permanent solutions. Knowing what causes the problem helps you choose the right fix for your specific situation.
Signs Your Coaster Pins Need Repair
Your smart mug coaster will show clear warning signs when the charging pins need repair. Recognizing these signs early helps you fix the problem before it gets worse.
The most obvious sign is when your mug won’t charge at all. You place the mug on the coaster, but the light doesn’t turn on. The battery doesn’t increase. This happens because the pins stay stuck in the down position and never make contact with your mug’s base.
You might also notice the pins look visibly retracted. Open your eyes wide and look directly at the coaster. The metal pins should stick up noticeably. If they sit flat or barely protrude above the surface, they need attention.
Another warning sign is inconsistent charging. Your mug charges sometimes but not other times. This suggests the pins are partially stuck or moving unpredictably. You might need to wiggle the mug around to get it to work.
Pay attention to physical resistance when you try to move the pins manually. Use a gentle touch with your finger or tweezers. Healthy pins move smoothly up and down. Stuck pins feel stiff or completely frozen in place. Broken pins won’t budge no matter how carefully you push.
Listen for unusual sounds too. Some coasters make a clicking noise when pins retract and extend normally. If you hear grinding sounds or silence when nothing happens, the mechanism is likely damaged.
Check the mug’s bottom as well. Look for visible corrosion on the charging contacts. Dark spots or green discoloration indicate oxidation from moisture and debris. This buildup prevents proper electrical connection even if the pins work fine.
Finally, examine the coaster’s surface around the pins. Dried coffee residue, mineral deposits, or dust accumulation suggests the charging area needs cleaning. These deposits cause sticking and poor contact.
Catching these signs early makes repairs much simpler and faster.
Safety First: Preparing Your Coaster For Repair
Before you start working on your smart mug coaster, safety matters most. Taking a few minutes to prepare properly prevents accidents and damage to your device.
Disconnect the power first. This is the most important step you can take. Unplug the coaster from its power adapter completely. Do not skip this step, even if you think the repair will be quick. Electricity and metal tools do not mix well together.
Let the coaster sit for a few minutes after unplugging. This allows any residual electrical charge to dissipate safely. Your hands and tools will be much safer once you wait this short time.
Find a clean, well-lit workspace. You need to see the charging pins clearly. Poor lighting makes it easy to miss important details or accidentally damage something. A kitchen table or workbench works perfectly for this task.
Gather your tools before you begin. You will need tweezers, isopropyl alcohol, and possibly a knife or long-nose pliers depending on what you find. Having everything ready means you stay focused on the repair itself. You will not need to hunt for tools mid-repair.
Inspect the coaster carefully first. Look at the pins from different angles. Notice whether they are stuck in the down position or partially retracted. Check for visible debris, dried liquid, or corrosion around the pin area. This inspection tells you exactly what you are dealing with.
Protect your work surface. Place a clean cloth or paper towel under the coaster. This catches any liquid you use during cleaning and prevents alcohol from damaging your table.
Never rush this preparation phase. Taking time upfront makes the actual repair smoother and safer. You reduce the risk of breaking pins or injuring yourself. A prepared workspace leads to better results and faster completion.
Step-By-Step Fix: Freeing Stuck Pins With Tweezers And Alcohol
Now that your coaster is unplugged and ready, you can start freeing those stuck pins. This process works best when you’re calm and patient with the delicate mechanism.
Start by positioning your tweezers around the base of the first stuck pin. Grip it gently but firmly. Apply slow, steady upward pressure. Don’t yank or use force. The pin should move gradually if the spring mechanism still works. If it resists, stop and try a different approach.
Isopropyl alcohol is your best friend here. Apply a small amount directly to the stuck pin and the surrounding area. Let it soak for about 30 seconds. The alcohol dissolves mineral deposits and dried coffee residue that causes sticking.
While the alcohol works, use your tweezers to gently move the pin up and down. Make small motions. Do this repeatedly for about one minute. You should feel the pin becoming looser as the buildup dissolves.
Repeat this alcohol and tweezers process for each stuck pin. Work on one pin at a time. This prevents confusion and ensures thorough cleaning.
If a pin still won’t budge after several attempts, it may be broken internally. In this case, you can carefully extract it using a small knife. Once removed, use long nose pliers to crimp the pin’s spring slightly. This prevents it from retracting fully when you reinstall it.
After freeing all pins, wipe away excess alcohol with a clean cloth. Let everything dry completely for at least five minutes before plugging the coaster back in.
Test each pin by pressing your mug down gently. The pins should make solid contact. If charging works, you’ve successfully completed the repair. If problems persist, the coaster may need professional attention or replacement.
Step-By-Step Fix: Repairing Or Crimping Broken Pins
When pins are broken or severely damaged, you may need to extract and crimp them to prevent future retraction issues. This approach works best for pins that won’t respond to cleaning or gentle repositioning.
Start by unplugging the coaster completely from its power adapter. Wait a few minutes before proceeding. Broken pins often sit too low inside the coaster housing, making them unable to make proper contact with your mug.
Use a small knife or flat tool to carefully extract the broken pin from its socket. Work slowly and gently to avoid damaging the surrounding components. You’re looking for the pin itself, which may be bent or corroded inside the housing.
Once extracted, examine the pin closely. Look for signs of corrosion, bending, or internal damage. If the pin is salvageable, you can proceed to crimping.
Take long nose pliers and carefully crimp the pin’s base or sides. The goal is to create a slight deformation that prevents the pin from sliding back into its retracted position. Don’t crimp too hard, as this can break the pin completely.
Gently reinsert the crimped pin back into its socket. It should sit higher than before and feel more secure. Test the fit by gently pushing on it with a tweezers. The pin should resist retraction.
Repeat this process for any other broken or damaged pins. Once all pins are crimped and repositioned, plug the coaster back in and test your mug charging.
Crimping is more durable than cleaning because it addresses the mechanical failure directly. However, this method requires careful handling. If you feel uncomfortable working with small components, you might prefer to explore replacement options instead.
Preventing Future Pin Problems
Preventing future pin problems starts with simple, regular habits. Wipe your mug bottom clean after every use. Moisture and residue from your beverage can drip onto the coaster contacts. This buildup is the main reason pins stick in the first place.
Keep the coaster itself free of dust and debris. A soft, dry cloth works well for quick cleanups. Check the charging area weekly to catch any accumulation early.
Store your mug and coaster in a dry location. Humidity and temperature changes can cause condensation on the pins. This moisture creates the perfect environment for corrosion and sticking.
Avoid placing your coaster near water sources or in damp rooms. Kitchens with high steam from cooking are particularly problematic. If your coaster must stay in a humid area, consider using a small protective cover when not in use.
Handle the mug gently when placing it on the coaster. Rough contact can damage the pins over time. Align the mug carefully each time you set it down.
Be honest about your expectations. Even with perfect care, some users report recurring issues with pin retraction. This suggests the problem may be partly due to the coaster design itself. Prevention helps reduce frequency, but doesn’t guarantee the problem won’t happen again.
Check your charging connection monthly. Look for any signs of pins starting to stick before they fail completely. Early detection lets you address the issue quickly with simple cleaning.
Keep isopropyl alcohol and tweezers in an accessible spot. Having these tools ready means you can perform quick maintenance without delay. The faster you act on early signs of sticking, the better your results will be.
Share your experience with other users in online communities. Many people face this issue and finding solutions together helps everyone maintain their devices longer.
Common Mistakes That Make Pin Problems Worse
Many people make mistakes that turn a small pin problem into a major headache. The most common error is attempting to fix the coaster while it’s still plugged in. Never work on your device with power running through it. This creates safety risks and can damage the internal circuitry further.
Another frequent mistake is using too much force when pulling pins upright. Your tweezers should apply gentle, steady pressure. If you yank or twist aggressively, you risk snapping the pin completely or damaging the socket itself. Broken pins are much harder to fix than stuck ones.
Some people skip the unplugging step entirely and go straight to applying liquid. Moisture and electricity don’t mix well. You could short circuit the entire coaster or hurt yourself. Always disconnect the power adapter first, wait a few seconds, then proceed with cleaning.
Using the wrong cleaning liquid is another common mistake. Tap water, vinegar, or other household cleaners can leave residue or corrode the metal pins. Isopropyl alcohol is your best option because it evaporates quickly and dissolves mineral buildup without leaving traces.
Rushing through the process causes problems too. People often move pins too quickly or skip the waiting time for alcohol to work. Give the liquid a moment to break down the stuck material. Move each pin gently and repeatedly until it responds.
Some users also fail to clean the mug bottom or coaster surface. If debris remains, pins will stick again within days. Take time to wipe both surfaces clean before reassembling everything.
Finally, don’t assume one cleaning session will solve everything permanently. Pin sticking can recur, especially in homes with hard water or high humidity. Plan for regular maintenance checks and keep your cleaning supplies nearby. Staying proactive prevents frustration later.
Final Thoughts
Fixing sticky charging pins on your smart mug coaster is a simple job. Most of the time, a little patience and the right tools solve the problem fast.
Start with the basics. Unplug the coaster, grab your tweezers, and check for debris. Many pin problems clear up with a quick cleaning session.
If pins still won’t move, isopropyl alcohol works wonders. Let it sit for a moment, then gently work the pins up and down. This dissolves buildup that regular wiping misses.
For pins that are truly broken, crimping is your best long term fix. It’s more work than cleaning, but it stops the retraction problem for good. Extract, crimp, and reinsert carefully for lasting results.
Remember that prevention matters just as much as repair. Wipe your mug bottom regularly. Keep the coaster surface clean and dry. These small habits go a long way.
That said, be realistic about what maintenance can do. Some users report that pins act up again, even with good care. This is a known limitation of these devices, not a sign you did something wrong.
If you hit a wall, don’t panic. Customer support isn’t always reliable for these products. Online communities often have better answers than official channels.
Keep your tweezers and alcohol handy for regular checkups. A quick monthly inspection catches small issues before they become big headaches.
Fixing charging pins isn’t complicated once you know the steps. Unplug first, clean thoroughly, and crimp if needed. Avoid rushing or using excessive force, since these mistakes make things worse.
With the right approach, your mug coaster can work reliably again. And if problems return, you’ll already know exactly what to do next time.
Frequently Asked Questions
Why do smart mug coaster pins get stuck in the first place?
Pins retract and stick because debris builds up on the charging contacts. Dust, dried liquid, or mineral deposits create a barrier that prevents pins from moving freely. Over time, this buildup hardens and locks the pins in the down position.
Can I fix stuck pins without taking the coaster apart?
Yes. You can fix most stuck pins without disassembly. Simply unplug the coaster first, then use tweezers to gently pull pins upright. Apply isopropyl alcohol to dissolve the buildup while moving the pins up and down slowly. This approach works for debris related sticking.
What’s the difference between cleaning and crimping pins?
Cleaning removes temporary buildup and works best for pins that are stuck but not broken. Crimping involves bending broken pins with long nose pliers to prevent retraction. Crimping is more durable because it addresses the mechanical failure directly, while cleaning is temporary for pins that keep getting stuck.
Will my pins stay up after I clean them?
Pins will stay up if you successfully remove all buildup and reposition them correctly. However, some users report that sticking returns over time. Regular maintenance helps, but it doesn’t guarantee permanent prevention. Check your coaster monthly and repeat the cleaning process if needed.
What should I do if customer support won’t help?
Most users find that customer support is unavailable for this issue. Your best resource is the online community of smart mug users who share solutions. Document your steps, take photos of the problem, and post in forums to get advice from others who’ve fixed this.

Hi, I’m Rue Hessel, the founder and voice behind TheGenTool. I’m a passionate tech enthusiast who loves exploring the latest gadgets, smart devices, and electronics that shape our everyday lives. Through my website, I share honest, hands-on reviews of trending Amazon products to help you make smarter and more confident buying decisions.