How To Fix Connected Rowing Machine Pulley Strap Fraying?
Does your rowing machine make a strange noise with every pull? That annoying sound often comes from a frayed pulley strap. It is a common problem, but it does not mean your machine is broken for good.
Fraying usually happens when the strap sits wrong on the pulley. Sometimes it twists. Sometimes the cable routing is off. These small issues create friction, and that friction wears down the strap fibers over time.
The good news? You can fix this yourself. You do not need to call a repair technician or buy a whole new machine.
In a Nutshell
- Find the cause first. Check if the strap sits wrong on the pulley or if the cable routing is off. This helps you fix the real problem, not just the symptom.
- Remove the housing gently. Take your time to access the strap mechanism without causing extra damage.
- Trim the frayed edges. Cut off any loose or damaged fibers since they no longer work properly.
- Seal the strap ends. Use a small flame to melt and seal the remaining fibers. This stops fraying from spreading further.
- Re-thread the strap evenly. Make sure it sits centered and straight on the pulley. A twisted strap leads to more fraying.
- Clean and lubricate the pulleys. Smooth pulleys reduce friction and help your strap last longer.
- Check for extensive damage. If the strap looks badly worn beyond the edges, it may be time to replace it completely.
Why Rowing Machine Pulley Straps Fray
Pulley straps on rowing machines fray for several specific reasons. Understanding these causes helps you prevent the problem from happening again.
Improper strap positioning is the most common culprit. When the strap sits off center or twisted on the pulley, it rubs against sharp edges. This constant friction wears down the fabric fibers until they start to separate and fray.
Poor cable routing also causes significant wear. If your cable doesn’t follow the correct path through the machine, it pulls the strap at odd angles. This uneven tension creates friction points where the strap bends too much. Over time, those stress points develop into frayed edges.
Pulley size mismatches contribute to fraying too. When a strap is too large for its pulley, it doesn’t sit flat and smooth. The excess fabric bunches up and rubs against the pulley edge. Smaller pulleys can grip the strap too tightly, causing similar damage.
Lack of lubrication makes fraying worse. Dry pulleys create more friction against the strap material. This heat and friction damage the fibers faster than a well maintained system.
Ignoring early warning signs allows small frays to become big problems. If you hear squeaking or see tiny loose threads early, addressing them immediately stops major damage. Waiting until the strap is badly damaged makes repairs harder.
Heavy use without maintenance accelerates fraying. Rowing machines that get frequent workouts need regular pulley cleaning and strap inspection. Sweat and dust buildup increases friction and speeds up wear.
The good news is that most fraying happens gradually. Catching it early and fixing the underlying cause prevents complete strap failure.
Tools and Safety Precautions Before You Start
Before you start fixing your rowing machine pulley strap, gather the right tools and follow basic safety steps. This preparation keeps you safe and makes the repair go smoothly.
Gather essential tools first. You will need a screwdriver set to remove the housing panels. A small flashlight helps you see inside the machine clearly. Keep scissors or a utility knife nearby to trim frayed edges safely. You should also have a lighter or small flame tool to seal strap fibers. A soft cloth works well for cleaning pulleys before reassembly.
Prepare your workspace. Find a clean, flat area with good lighting. Lay out all your tools so you can reach them easily. This prevents fumbling around while your machine is open. A small table next to your rowing machine works perfectly.
Safety comes first. Always unplug your rowing machine before starting any work. Never work on the machine while it has power. Wait at least 30 minutes after use so internal parts cool down. Wear safety glasses to protect your eyes from flying debris when trimming frayed edges.
Know your machine. Check your user manual to understand your specific pulley system. Different models have different housing designs. Some machines require removing just one panel while others need more disassembly. Familiarize yourself with cable routing patterns before you begin.
Take photos before disassembly. Use your phone to snap pictures of the strap and cable setup. These photos help you remember exactly how everything connects. You can reference them during reassembly to ensure proper alignment.
This preparation takes just 10 minutes but saves you from mistakes and injuries during the actual repair work.
Step-by-Step Guide to Accessing and Inspecting the Strap
Start by locating the housing panels that cover your rowing machine’s pulley system. Most machines have panels held together with screws. Use your screwdriver to remove these fasteners carefully. Work slowly to avoid stripping the screw heads or damaging the plastic panels.
Once you remove the housing, you’ll see the pulley and strap assembly. Look closely at how the strap sits on the pulley wheel. The strap should rest centered and flat against the pulley surface. If it looks twisted, off to one side, or bunched up, that’s your problem.
Inspect the entire length of the strap for visible fraying. Frayed areas appear as loose fibers sticking out from the edges. Check where the strap connects to the cable routing system. Poor routing often causes the strap to rub against sharp edges or bend at odd angles.
Examine the pulley wheel itself for damage. Look for cracks, flat spots, or rough areas that could catch the strap. Run your finger gently around the pulley edge to feel for burrs or sharp spots.
Pay attention to how the cable feeds through the machine. Cables should run straight and smooth without kinks or tight bends. Tight bends force the strap to sit incorrectly on the pulley, causing friction and fraying.
Take clear photos of what you see before making any changes. This helps you remember the original setup and makes reassembly easier. Document the strap position, cable routing, and any visible damage. These photos become your reference guide for putting everything back together correctly.
How to Repair a Frayed Pulley Strap
Once you’ve accessed the pulley area and inspected the damage, it’s time to repair the fraying. The method you choose depends on how severe the fraying is and where it occurs on the strap.
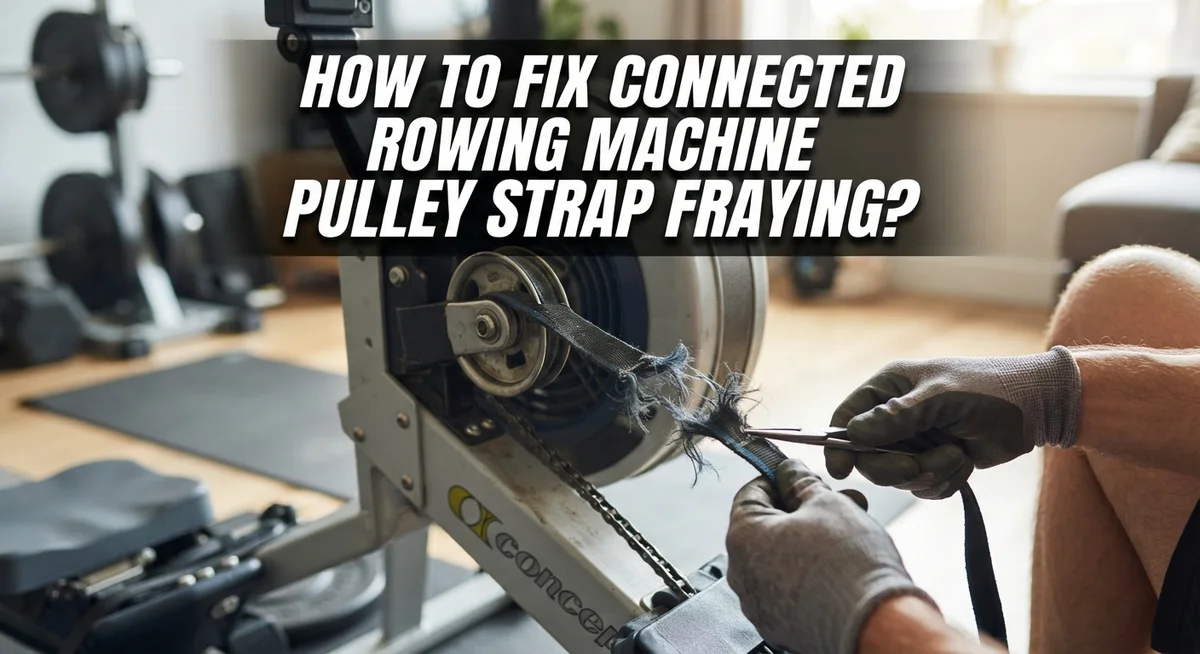
Start by trimming frayed edges. Use sharp scissors or a craft knife to carefully cut away any loose fibers hanging from the strap. Remove only the damaged portions. This simple step often solves minor fraying issues immediately.
Seal the cut edges to prevent further fraying. Hold a lighter or match near the trimmed edge to gently melt the synthetic fibers. The heat fuses the fibers together and creates a sealed edge. Work slowly and keep the flame just close enough to melt without burning the material. Let the sealed edge cool completely before touching it.
Check the strap position on the pulley. Make sure the strap sits flat and centered on the wheel. A twisted or off-center strap causes uneven wear that leads to more fraying. Adjust it so it tracks straight through the pulley.
Clean the pulley surface thoroughly. Dust and debris create friction that damages the strap. Wipe the pulley wheel with a dry cloth to remove buildup.
Apply light lubrication to the pulley. A small amount of silicone-based lubricant reduces friction between the strap and wheel. Don’t over lubricate, as excess lubricant attracts dirt.
Re-thread the cable if needed. Ensure the cable routes smoothly without twists or sharp bends near the strap. Proper routing prevents stress points that cause fraying.
Test your machine carefully after repair to confirm the strap moves smoothly without noise or catching.
Re-Threading and Aligning the Strap on the Pulley
Re threading and aligning your strap properly prevents future fraying and restores smooth operation. Start by examining how the strap currently sits on the pulley wheel. The strap should run straight and centered, not twisted or bunched to one side.
Gently pull the strap away from the pulley to see the full length. Look for any twists along its path. If you spot a twist, carefully unwind it by rotating the strap back to its natural flat position. This single step often fixes alignment issues that cause uneven wear.
Next, check the cable routing through your machine. The cable should follow a straight path without sharp angles or tight bends. If the cable pulls at an awkward angle, it forces the strap off center on the pulley. Adjust the cable guides or clips if your machine has them to create a smoother line.
Re thread the strap evenly across the pulley width. Make sure both edges of the strap contact the wheel equally. An off center strap concentrates friction on one side, causing faster deterioration.
Clean any dust or debris from the pulley groove before repositioning the strap. Dirt particles act like sandpaper and accelerate fraying. Use a dry cloth to wipe the pulley surface thoroughly.
Once the strap sits properly aligned and centered, manually pull the handle a few times to test the movement. The strap should move smoothly without catching or making noise. Listen for any grinding sounds that indicate misalignment.
Proper alignment distributes wear evenly across the strap surface and extends its lifespan significantly. Check alignment every month during regular maintenance to catch problems early before serious fraying develops.
Preventing Future Fraying
Regular inspection is your best defense against fraying problems. Check your rowing machine’s pulley strap every two weeks during normal use. Look for small loose fibers or discoloration on the strap surface. Catching early signs means you prevent major damage later.
Keep your machine in a dry environment. Moisture weakens synthetic materials and speeds up fraying. Store your rowing machine away from direct sunlight and extreme temperature changes. These conditions degrade the strap fibers over time.
Clean the pulley area regularly to reduce friction damage. Dust and debris act like sandpaper against your strap. Use a soft cloth to wipe the pulley groove weekly. Remove any lint or particles stuck in the mechanism.
Apply appropriate lubrication to the pulley every month. A small amount of silicone based lubricant reduces friction between moving parts. This simple step extends strap life significantly. Avoid over lubricating, as excess oil attracts dust.
Maintain proper cable routing throughout your machine. Twisted or misaligned cables create uneven pressure on the strap. Check that cables follow the correct path during each use. Improper routing causes localized wear and fraying.
Verify the strap sits centered on the pulley. An off center strap experiences more friction on one side. This uneven wear leads to fraying in specific spots. Adjust positioning if you notice the strap drifting.
Use your rowing machine with consistent tension. Sudden jerks or aggressive pulling stress the strap unnecessarily. Smooth, controlled movements distribute wear evenly across the strap surface. This practice prevents premature fraying and extends equipment life.
Common Mistakes to Avoid During Repair
When you repair a fraying pulley strap, certain mistakes can make the problem worse. Understanding what to avoid keeps your rowing machine working smoothly.
Don’t rush the inspection process. Many people skip looking at the entire strap and pulley system. Take time to examine how the strap sits on the wheel. Check if it’s twisted or off center. A quick glance misses important details that cause the fraying in the first place.
Avoid leaving the strap twisted during reassembly. A twisted strap rubs against the pulley unevenly. This creates friction that damages fibers faster. Always straighten the strap before you secure it back into position.
Don’t ignore cable routing problems. Poor routing forces the strap to pull at wrong angles. This puts stress on specific areas and causes premature fraying. Follow the cable path through your entire machine to spot routing issues.
Never use excessive heat when sealing frayed edges. Too much flame melts the strap material itself, not just the loose fibers. Hold the heat source several inches away and move it quickly. You want to seal the fibers, not damage the strap structure.
Don’t skip cleaning the pulley groove. Dust and dirt create friction that damages the strap constantly. A dirty pulley undoes your repair work within days. Clean thoroughly before you reposition the strap.
Avoid over tightening when you reassemble components. Tight housing can pinch the strap or force it out of alignment. Tighten bolts firmly but not excessively. The strap should move freely across the pulley surface without binding.
Troubleshooting Ongoing Noise or Wear Issues
When your connected rowing machine makes noise during use, fraying on the pulley strap is often the culprit. Ongoing noise signals that your strap needs attention right away. Ignoring these sounds leads to worse damage over time.
Start by listening carefully to where the noise comes from. Does it happen during the pull stroke or the return? This helps you identify if the strap sits off center on the pulley. A misaligned strap creates friction that produces squeaking or grinding sounds.
Remove the housing to inspect the pulley strap closely. Look for loose fibers sticking out from the edges. Check if the strap twists or sits unevenly on the pulley groove. Even small misalignments cause continuous wear and noise.
Once you spot fraying, trim the loose fibers carefully with scissors. Keep your cuts small and precise. For stubborn frayed edges, you can seal them by carefully applying heat to melt the fibers together. Hold a lighter near (not touching) the frayed area. The goal is sealing, not burning. This prevents the fraying from spreading further.
After sealing, reposition the strap so it sits centered on the pulley. Pull it evenly across the width. Test the movement by manually pulling the handle several times. The noise should decrease significantly.
Prevention stops future problems before they start. Check your pulley strap monthly for early signs of fraying. Keep the pulley groove clean and free from dust. Verify your cable routing stays correct throughout the machine. These simple steps extend your strap’s life and keep your rowing machine running quietly.
If noise continues after these repairs, the strap may need replacement rather than repair.
Final Thoughts
Fixing a frayed pulley strap does not need to be a big challenge. You now know the simple steps that solve this problem quickly.
A little patience goes a long way here. Take your time to inspect the strap and pulley system properly before making any changes.
Most fraying problems come from three main causes. These include poor strap seating, twisted alignment, or cable routing issues.
Small fixes often prevent bigger problems. Trimming loose fibers and sealing the edges can add real time to your strap’s life.
Remember that fraying often signals a deeper issue. The root cause needs attention, not just the visible damage.
Your rowing machine deserves regular care. A few minutes of checking each month can save you from bigger repairs later.
If the strap keeps fraying after your fixes, something else may be wrong. Check the pulley size and cable path again.
Sometimes a strap simply reaches the end of its life. This happens especially with heavy or frequent use.
Replacement becomes the smart choice when damage goes beyond simple fraying. Trying to fix a badly worn strap wastes time and effort.
Keep basic tools ready for quick fixes. Scissors, a lighter, and lubricant handle most fraying issues you will face.
Your machine works best when all parts move smoothly together. The pulley strap plays a key role in that smooth motion.
Stay alert to changes in sound or movement. These early signs help you catch problems before they grow.
With the right care, your connected rowing machine can serve you well for years. Simple maintenance steps make a real difference in performance and safety.
Frequently Asked Questions
Why does my rowing machine pulley strap fray?
Fraying happens when the strap rubs against the pulley in the wrong way. This usually occurs because the strap sits off center on the pulley. Twisted straps also cause uneven friction. Poor cable routing forces the strap to pull at incorrect angles, which speeds up fraying. Dust and dirt in the pulley groove add extra friction that damages fibers over time.
How do I know if my pulley strap needs fixing?
Listen for squeaking or grinding sounds during rowing. These noises often signal strap misalignment or fraying. Stop and remove the housing to inspect the pulley area closely. Look for loose fibers sticking out from the strap edges. If you see white or colored threads coming loose, fraying has started. Early detection helps you fix small problems before they become big ones.
Can I repair fraying myself or do I need a replacement?
You can repair minor fraying at home. Trim loose fibers with sharp scissors and seal the edges by briefly passing a flame near the cut area. This melts the fiber ends together and stops further unraveling. However, if the strap shows deep damage, large torn sections, or continues fraying after repairs, replacement is the better choice. Extensive damage means the strap material has weakened too much to hold up.
What’s the best way to prevent fraying from happening again?
Check your pulley strap monthly for early signs of damage. Keep the pulley groove clean and free of dust. Make sure the strap sits centered on the pulley during reassembly. Verify your cable routing is correct so the strap pulls straight. Use the right pulley size for your machine model. Regular inspection catches problems early and keeps your rowing machine running smoothly.

Hi, I’m Rue Hessel, the founder and voice behind TheGenTool. I’m a passionate tech enthusiast who loves exploring the latest gadgets, smart devices, and electronics that shape our everyday lives. Through my website, I share honest, hands-on reviews of trending Amazon products to help you make smarter and more confident buying decisions.