How To Fix Smart Luggage Handle Telescoping Button Sticking?
Your smart luggage handle helps you move fast through airports. But when the telescoping button sticks, that speed disappears fast.
You push the button. Nothing happens. You push again, and the handle barely moves.
This is one of the most common problems travelers face with smart luggage. The good news? You can usually fix it yourself.
In a Nutshell
- Check for misalignment first. Most sticking buttons happen because the handle sits crooked in its track. A simple realignment often solves the problem instantly.
- Never force the button. Pushing harder can snap internal springs or crack the plastic housing. This turns a small fix into an expensive repair.
- Clean the internal components. Dust and debris build up inside the handle tubes over time. A quick clean often restores smooth movement.
- Lubricate the moving parts. Dry mechanisms cause friction and sticking. A light lubricant keeps the button and handle gliding easily.
- Test after every adjustment. Don’t wait until the end to check your work. Testing along the way helps you spot exactly what fixed the issue.
- Most problems don’t need replacement. With cleaning, lubrication, and proper alignment, your handle can work like new again. Save your money and skip buying a whole new suitcase.
Understanding the Telescoping Handle Mechanism
Smart luggage handles use a simple mechanical system. A button connects to springs and levers inside the handle tubes. When you press the button, it releases a locking mechanism. This allows the handle to slide up and down smoothly.
The telescoping design works in stages. The handle has multiple tubes that nest inside each other. Each tube locks into place at different heights. The button triggers a release that frees these locks one at a time.
Understanding how this works helps you fix problems faster. The mechanism depends on precise alignment between all moving parts. Even small shifts can create friction and resistance.
Inside the handle, you’ll find several key components. Springs push the locking pins into place. Guides keep the tubes moving in a straight line. A release lever connects directly to the button you press. All these parts must work together without obstruction.
When something goes wrong, the entire system gets stuck. A stuck button usually means one of these parts isn’t moving freely. Dust particles can jam the guides. Springs can lose tension. The tubes themselves might shift out of alignment.
The good news is that most issues stem from simple causes. Dirt buildup is the most common culprit. Debris enters the handle tubes when you travel. It accumulates around the locking mechanism over time.
Temperature changes also affect performance. Cold weather makes lubricants thicker and slower. Heat can cause plastic components to expand slightly. These changes put extra pressure on the button.
Knowing this background helps you approach repairs with confidence. You’re not dealing with complex electronics or mysterious parts. You’re working with basic mechanical components that respond well to cleaning and proper care.
Common Causes of a Sticking Telescoping Button
Dust and debris are the leading culprits behind a sticking telescoping button. Over time, particles accumulate inside the handle tubes and around the button mechanism. This buildup creates friction that prevents smooth movement.
Handle misalignment ranks as the second most common cause. When your luggage gets bumped or dropped, the handle can shift slightly out of its track. Even a small misalignment stops the button from working properly.
Moisture and corrosion also play a role in button sticking. If your luggage gets exposed to humidity or salt air, internal metal components can rust or corrode. This rough surface prevents the mechanism from sliding freely.
The clasp that holds the handle in place sometimes jams. When the clasp gets bent or misaligned, it restricts the handle’s movement. The button may feel stuck even though the actual button mechanism works fine.
Lack of lubrication causes significant problems too. Moving parts need proper lubrication to function smoothly. Without it, friction builds up and the button becomes difficult to press.
Partial extension often signals a mechanical obstruction. Your handle extends partway but won’t go all the way up or down. This usually means something is blocking the handle’s path inside the tube.
Previous repair attempts can create new issues. If someone forced the button or applied incorrect lubrication, it can cause sticking. These mistakes sometimes cause more damage than the original problem.
Temperature fluctuations affect the materials inside your luggage. Plastic components can expand or contract slightly with temperature changes. This expansion sometimes causes the handle to bind in its track.
Understanding these causes helps you identify the specific problem with your luggage. Once you know what’s wrong, the fix becomes much easier to execute.
Step-by-Step Guide to Diagnosing the Problem
Start by examining your luggage handle closely. Look for visible signs of damage or misalignment before you attempt any fixes. A stuck button often signals an internal problem that you need to identify first.
Open your luggage completely. Unzip the interior lining to access the clasp mechanism underneath. This step reveals whether the handle sits crooked in its track. Check if the handle aligns properly with the housing. Misalignment prevents the button from functioning smoothly.
Press the telescoping button gently while observing the handle. Does it move at all? Does it move partially? Does it refuse to budge? These observations tell you whether the problem is mechanical obstruction or button failure. Partial extension suggests debris blocking the mechanism.
Depress the button multiple times slowly. Feel for resistance or grinding sensations. These feelings indicate where friction occurs inside the handle. Listen for clicking sounds. Clicks mean the mechanism still has some function.
Inspect the toggle button itself. Look for cracks, loose pieces, or deformation. Push the button from different angles. Sometimes the button works from one side but not the other.
Check the handle tubes for visible obstructions. Shine a light inside to spot dust, lint, or debris. Look at the springs and metal components for rust or corrosion. Examine the track where the handle slides.
Test the handle in both directions. Try extending it fully and retracting it completely. Note exactly where it gets stuck. Does it stop at a specific point? This information helps you locate the problem area.
Take photos of the internal components. These images help you remember the original configuration. They also help you explain the problem if you need additional help later.
How To Fix a Stuck Telescoping Button
A stuck telescoping button needs a systematic approach to fix. Start by examining what happens when you press the button. Does the handle move at all, or is it completely frozen? This tells you whether the problem is minor friction or serious obstruction.
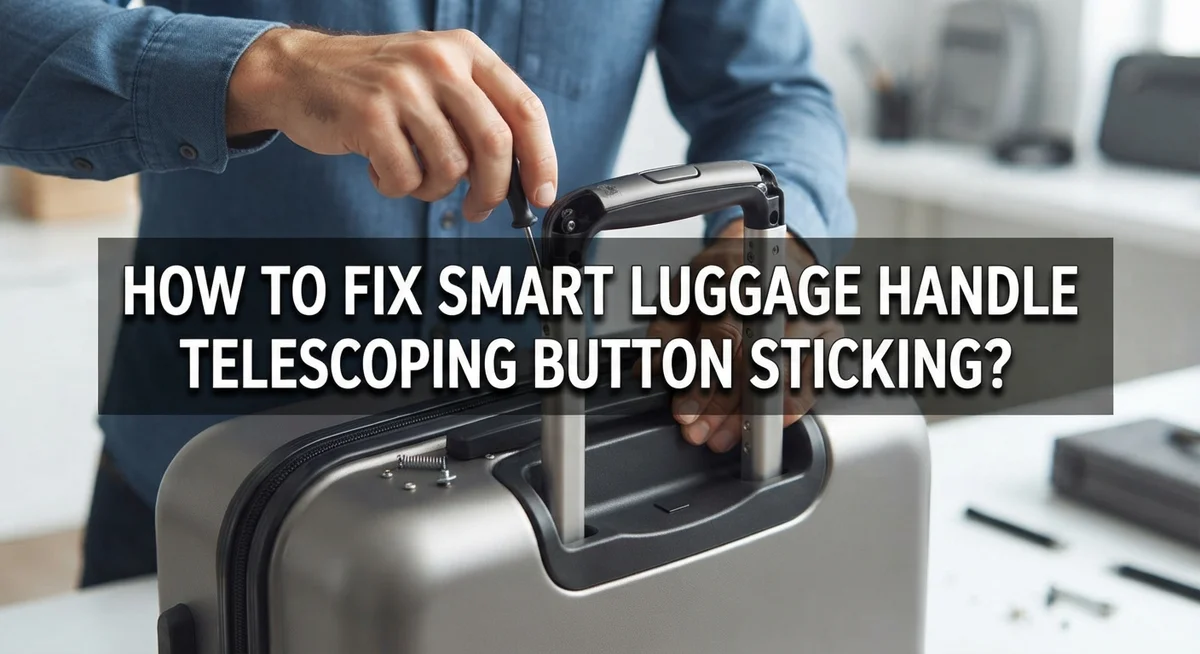
Gently wiggle the handle side to side while pressing the button. Sometimes a small movement frees the mechanism without forcing anything. Apply steady, light pressure rather than sudden jerks. Forcing a stuck button causes internal damage that makes repair much harder.
Next, inspect the clasp that holds the handle in place. Open your luggage and look inside where the handle connects. Check if the clasp is bent, misaligned, or blocking the button’s path. A misaligned clasp prevents the button from moving freely even when everything else works fine.
Clean the internal components around the button and handle mechanism. Dust and debris accumulate inside luggage over time. Use a soft brush or compressed air to remove particles gently. Pay special attention to crevices where the button meets the handle.
Apply a small amount of lubricant to the button mechanism and moving parts. This reduces friction that causes sticking. Let the lubricant sit for a few minutes to penetrate the mechanism.
Test the button after each step. Press it slowly and feel for resistance. If the handle moves slightly farther each time, you’re making progress. Continue this process until the button moves smoothly through its full range.
If the handle still sticks after cleaning and lubrication, realignment may be necessary. Check that the handle tubes sit straight and parallel. Bent tubes prevent smooth telescoping action and cause button sticking.
Cleaning and Lubricating the Handle Mechanism
Cleaning and lubricating your luggage handle mechanism is often the most effective way to restore smooth operation. Start by gathering simple household items you likely already own. You’ll need a soft cloth, warm water, and a gentle cleaning solution.
Begin by unzipping your luggage case completely. Access the liner compartment where the handle connects to the suitcase. Use your soft cloth dampened with warm water to wipe away dust and debris around the button and handle tubes. Pay special attention to crevices where particles accumulate over time.
Once you’ve cleaned the visible areas, gently work the cloth into the spaces between the button and its housing. Move slowly and carefully to avoid pushing debris deeper into the mechanism. Let the cleaned areas dry completely before moving forward.
Next, apply lubrication to the moving parts. Use a lubricant that works well on plastic and metal components. Apply only a small amount directly to the button mechanism and along the handle tubes. Less is more here, as excess lubricant attracts dirt.
After applying lubricant, depress the button several times slowly. This helps distribute the lubricant evenly throughout the mechanism. You should notice the button becoming easier to press.
Test the handle by extending and retracting it multiple times. The movement should feel smoother than before. If stiffness remains, repeat the lubrication process after allowing time for the lubricant to settle.
Remember that maintenance prevents future sticking. Clean your handle mechanism every few months, especially if you travel frequently. This simple routine keeps your luggage functioning reliably for years.
Realigning a Misaligned Handle
When your luggage handle sits at an odd angle or won’t extend evenly, misalignment is likely the culprit. This happens when internal components shift out of position, preventing smooth button operation.
Start by examining how the handle sits when fully retracted. Does one side sit higher than the other? Does it lean left or right? These visual clues tell you the handle needs realignment.
Gently pull the handle upward while depressing the button. Sometimes the handle catches on the frame during extension. This gentle pulling motion can help seat it back into the correct position. Release the button and check if the handle now extends straight.
Next, look at the handle tubes themselves. They should align perfectly with the slots in your luggage frame. If they appear twisted or bent, the internal mechanism has shifted. Carefully wiggle the handle side to side while slowly extending it. This small movement helps reposition internal springs and guides.
Pay attention to where resistance occurs. Does the button feel stuck in one direction only? Does the handle stop partway up? These clues show exactly where misalignment exists.
Test the handle multiple times after each adjustment. Sometimes realignment takes several cycles of extension and retraction to fully settle into place. The internal components need time to find their correct positions.
If the handle still resists after gentle manipulation, the problem may run deeper into the frame structure. However, most misalignment issues resolve through patient, careful wiggling and testing. Avoid forcing anything, as this causes permanent damage to the delicate internal mechanisms that control handle movement.
Common Mistakes to Avoid When Fixing the Button
When fixing your smart luggage handle button, avoid these common mistakes that can make things worse.
Don’t force the button down hard. Pushing with excessive pressure damages the internal mechanism. The button sticks because something blocks it, not because it needs brute strength. Gentle pressure works better than aggressive force.
Skipping the inspection step is a major error. Many people apply lubricant right away without checking what’s actually causing the problem. You might be lubricating the wrong area. Always look inside first to understand the real issue.
Neglecting to test after each small adjustment wastes your time. Make one change, then press the button to see if it helps. This approach tells you which fix actually works.
Don’t ignore handle alignment completely. If the handle tubes sit crooked when retracted, forcing the button won’t help. The mechanical obstruction stays in place. Check the alignment before and after your fixes.
Avoid using the wrong lubricant type. Some products attract dust or gum up over time. You need something light that flows into tight spaces without leaving sticky residue.
Another mistake is working on a closed suitcase. You can’t see what’s happening inside. Open your luggage fully so you have clear visibility of the button mechanism and handle tubes.
Don’t assume the button itself is broken. Most sticking problems come from misalignment, debris, or dry mechanisms. The button usually works fine once you remove the obstruction.
Finally, rushing through the process causes you to miss simple solutions. Take your time. Inspect carefully. Make small adjustments. Test frequently. This patient approach prevents damage and solves most button sticking issues.
Troubleshooting Persistent or Recurring Issues
When your smart luggage handle button keeps sticking even after you’ve tried basic fixes, you need a different approach. Persistent problems often signal deeper mechanical issues that require systematic troubleshooting.
Start by testing the button in different positions. Press it while the handle is fully retracted, halfway extended, and fully extended. This tells you if the sticking happens at specific points or everywhere. A button that only sticks at certain angles points to misalignment rather than dirt buildup.
Next, inspect the handle clasp carefully. Open your luggage completely and look at where the handle connects to the frame. Check if any plastic pieces are cracked or bent. Even small damage prevents smooth operation. Run your fingers along the entire connection point to feel for rough spots or debris wedged inside.
If the button feels mushy or unresponsive rather than stuck, the internal spring mechanism may be failing. Try depressing it rapidly ten times in succession. Sometimes this resets a stuck spring. If nothing changes, the spring likely needs professional repair.
Listen closely when you press the button. A grinding sound suggests metal parts rubbing incorrectly. A clicking sound means the mechanism is trying to engage but something blocks it. These audio clues help identify what’s actually wrong.
Document exactly when the sticking occurs. Does it happen after extended travel? After temperature changes? After the handle gets wet? Patterns reveal the root cause. A handle that works fine at home but sticks after flights suggests moisture damage or temperature related issues.
Test your fixes multiple times before concluding they failed. Some mechanisms need several cycles to reset properly. Give each solution at least five complete extension and retraction attempts before moving forward.
Final Thoughts
A sticky telescoping button feels annoying. But most of the time, you can fix it yourself.
Cleaning, lubrication, and realignment solve most problems. You do not need special tools or expert help for these steps.
Start simple. Inspect the clasp first. Check for obvious dirt or debris blocking the button mechanism.
Then move to lubrication. A small amount of the right lubricant keeps parts moving smoothly. This simple step prevents many future issues.
Realignment matters too. Handles that sit at odd angles often cause button problems. Straightening the handle frame fixes sticking in many cases.
Remember to test after every adjustment. Never skip this step. Testing shows you which fix actually worked.
Patience makes a real difference here. Rushing through repairs causes more harm than good. Take your time with each step.
If basic fixes do not work, look deeper. The problem might involve the spring mechanism or frame structure. Persistent issues need more careful troubleshooting.
Avoid forcing the button at any point. Excessive pressure damages internal parts permanently. Gentle manipulation always works better.
Most smart luggage handles do not need replacement parts. Simple maintenance keeps them working well for years. Regular care prevents new problems from developing.
Keep your suitcase clean inside and out. Dust and debris cause many button issues over time. A few minutes of maintenance saves future frustration.
Trust the process outlined here. These steps work for most telescoping handle problems. With patience and care, your luggage handle will function smoothly again.
Your smart luggage deserves proper care. Simple fixes now prevent bigger problems later. Keep these tips handy for future reference.
Frequently Asked Questions
Why does my smart luggage handle button stick when I try to extend it?
A stuck button usually means something blocks the internal mechanism. The handle clasp may jam, or the button itself has debris inside. Sometimes the handle sits at an odd angle, which prevents smooth movement. Check if the button feels truly stuck or just stiff. A stiff button often needs cleaning and lubrication rather than replacement.
Can I fix a stuck button without opening my suitcase?
You can try basic fixes with the case closed. Gently wiggle the handle up and down to loosen any obstruction. Press the button slowly several times to see if it frees up. However, opening the suitcase lets you inspect the clasp and internal components properly. Most effective fixes require you to look inside and clean the moving parts.
What’s the safest way to free a stuck button?
Never force the button with hard pressure. Forcing damages the spring mechanism inside. Instead, apply gentle, steady pressure while wiggling the handle slightly. Work the button up and down in small motions. If it resists, stop and inspect the clasp for misalignment. Patience works better than force every time.
How often should I lubricate my luggage handle to prevent sticking?
Lubricate your handle every few months if you travel regularly. Clean travelers should do this twice yearly. Use a light lubricant on the button mechanism and handle joints. Avoid heavy oils that attract dirt. Regular maintenance prevents most sticking problems before they start.
What if the button still sticks after cleaning and lubricating?
Check handle alignment carefully. A misaligned handle puts pressure on the button mechanism. Gently bend the handle back into position if needed. Test the button after each small adjustment. If sticking continues, the internal spring may need inspection or the clasp may have a deeper issue requiring professional service.

Hi, I’m Rue Hessel, the founder and voice behind TheGenTool. I’m a passionate tech enthusiast who loves exploring the latest gadgets, smart devices, and electronics that shape our everyday lives. Through my website, I share honest, hands-on reviews of trending Amazon products to help you make smarter and more confident buying decisions.