How To Fix Smart Humidifier Water Tank Valve Dripping?
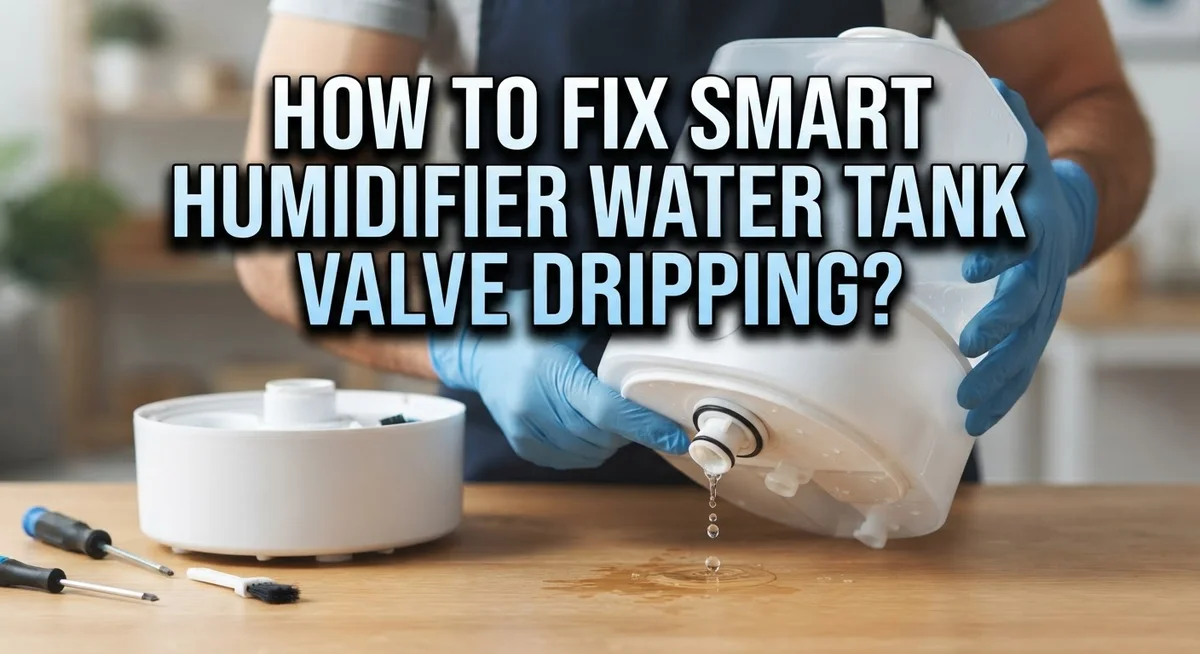
A dripping water tank valve can turn your smart humidifier into a soggy mess. You expect steady, quiet moisture in the air. Instead, you get puddles on the floor or a wet base tray.
This annoying issue has a few common causes. A faulty spring-loaded valve, a cracked tank, or a loose packing nut can all trigger leaks. Sometimes the fix is as simple as reseating the tank properly.
The good news? Most valve drips are fixable without calling a technician. You just need to know where to look and what to check first.
In a Nutshell
- Check the tank seating first. Most drips happen because the tank sits crooked on the base. A simple reseat often solves the problem instantly.
- Inspect the spring loaded valve. Press it a few times to see if it snaps back properly. A stuck valve is a common culprit behind leaks.
- Look for a loose packing nut. Tighten it gently behind the valve handle. This small fix stops many drips right away.
- Examine the rubber O-ring. Worn or misplaced O-rings cause water to escape. Replacing this tiny part can save your whole unit.
- Never ignore hairline cracks. Even tiny cracks in the tank can lead to steady dripping. Replace a cracked tank instead of trying to patch it.
- Prevention matters just as much as repair. Keep your humidifier level and always seal the lid tightly. Regular O-ring and spring checks will keep future drips away.
Why Your Smart Humidifier Water Tank Valve Is Dripping
A dripping valve usually points to one of several mechanical failures inside your smart humidifier. Understanding what causes the leak helps you fix it faster and prevent future damage.
The most common culprit is a worn rubber O-ring. This small circular seal sits inside the valve assembly and keeps water from escaping. Over time, mineral deposits from tap water or regular wear breaks down the O-ring material. When it deteriorates, water seeps out even when the valve should be closed.
A faulty spring-loaded valve mechanism ranks second on the problem list. The spring inside the tank cap is supposed to snap shut automatically. If this spring loses tension or gets stuck, water drips continuously. Mineral buildup from hard water often causes the spring to freeze in place.
Loose packing nuts create another common issue. The packing nut sits behind the valve handle and compresses the seal. If it loosens slightly, water finds gaps to escape through. This happens gradually as your humidifier runs through heating and cooling cycles.
Tank seating problems matter too. If your water tank doesn’t sit perfectly level on the base, pressure distributes unevenly. This misalignment forces water past the valve seal and onto your floor.
Finally, hairline cracks in the tank itself can cause dripping. These tiny fractures may be invisible at first glance but grow larger over time. Water pressure pushes through the crack whenever the tank is full.
Each of these issues requires a different approach to fix. The key is identifying which problem matches your situation. Once you know the cause, the solution becomes straightforward and manageable.
Quick Diagnostic: How to Identify the Source of the Leak
Start by unplugging your smart humidifier from the wall outlet. Safety comes first when you work with electrical devices.
Remove the water tank from the base carefully. Hold it over a sink or bucket to catch any remaining water inside.
Look at the spring loaded valve on top of the tank cap. Press it gently with your finger several times. A healthy valve snaps back quickly each time you release it. If it feels stuck or moves slowly, the spring has likely weakened.
Inspect the rubber O ring around the tank cap seal. Remove the cap and look closely at this ring. A cracked, flattened, or missing O ring will cause water to leak out. Gently pull the ring away and examine it under good lighting.
Check the packing nut behind the valve handle. This small nut sits where the valve connects to the tank. Tighten it slightly with your fingers. Do not use a wrench yet, as over tightening can damage the mechanism.
Look for visible cracks anywhere on the tank body. Hold the tank up to a light source and rotate it slowly. Even hairline cracks allow water to drip through.
Verify that the tank sits level and flat on the base. Place the empty tank back down and check if it wobbles. A crooked seating position forces water toward the valve area.
Finally, examine where the tank cap threads onto the tank opening. Look for cross threading marks or damage. Misaligned threads prevent a proper seal and cause drips.
Document what you find. Take mental notes or photos of any damage. This information helps you decide whether to clean, tighten, replace parts, or swap out the entire tank.
Step-by-Step Fix for a Loose Packing Nut and Worn O-Ring
A loose packing nut and worn O-ring are two of the most fixable causes of valve dripping. Let’s walk through how to address both issues step by step.
Start by unplugging your humidifier. Safety comes first. Remove the water tank and place it on a clean, dry surface. You’ll work with the valve assembly on top of the tank cap.
Look behind the valve handle. You’ll see a packing nut, which is a small hexagonal nut that holds the valve stem in place. This nut can loosen over time from vibration and regular use. Use an adjustable wrench or the appropriate sized wrench to tighten it. Turn clockwise slowly and gently. Don’t overtighten, as this can damage the valve stem or crack the plastic cap.
Once the packing nut is secure, move on to the O-ring. The rubber O-ring sits around the tank cap seal and creates a watertight barrier. Remove the tank cap carefully. You may need to unscrew it by hand or with gentle leverage.
Inspect the O-ring closely. Look for cracks, flattening, or discoloration. A worn O-ring loses its ability to seal properly. If it looks damaged or permanently compressed, replacement is your best option.
If the O-ring appears intact, clean it with a soft cloth and check that it sits evenly in its groove. Sometimes the O-ring shifts slightly during use, breaking the seal.
Reassemble the cap, ensuring it threads straight onto the tank opening. Screw it down firmly but not forcefully. Place the tank back on the base and fill it with water. Watch the valve for several minutes. The dripping should stop if both the packing nut and O-ring are now properly sealed.
How to Restore a Sticking Spring-Loaded Valve
A sticking spring loaded valve often loses its ability to snap back into place after you press it. This happens when mineral deposits build up inside the valve or when the spring weakens over time.
Start by unplugging your humidifier and removing the water tank. Locate the spring loaded valve on the tank cap. Press it down firmly and release it several times in quick succession. You should hear a clear clicking sound each time it springs back up. If the valve feels stuck or sluggish, it needs cleaning.
Fill a small cup with equal parts white vinegar and distilled water. Soak the entire tank cap in this solution for about 30 minutes. The vinegar dissolves mineral deposits that prevent smooth valve movement. After soaking, use a soft brush or old toothbrush to gently scrub around the valve opening and spring mechanism. Rinse thoroughly under clean running water.
Press the valve repeatedly again to test its response. The spring should feel responsive and quick. If it still sticks, soak it for another 15 minutes and repeat the scrubbing process.
Reassemble the cap and tank carefully. Make sure the cap threads straight onto the tank opening without tilting. Press the valve one final time before reinstalling the tank on your humidifier base.
Regular maintenance prevents this issue from returning. Clean your tank cap and valve mechanism every two weeks during heavy use. Check that the spring snaps back quickly each time you refill the tank. This simple habit keeps your valve working smoothly and stops dripping before it starts.
Fixing Tank Seating and Cross-Threaded Lid Issues
When your smart humidifier drips from the tank valve, improper tank seating and cross threaded lid issues often sit at the root. These problems are straightforward to fix once you understand what causes them.
Tank seating matters more than you might think. Your water tank must sit level and flat on the humidifier base. If the tank tilts or sits crooked, water pools around the valve seal. Remove the tank completely and inspect the base where it connects. Wipe away any dust or mineral buildup with a dry cloth. Place the tank back down slowly and listen for a soft click or seal sound. The tank should feel stable when you gently press down on it.
Cross threading happens when you screw the lid on at an angle instead of straight down. This misalignment breaks the seal between the cap and tank opening. Always align the cap threads carefully before turning. Start threading by hand first. You should feel smooth resistance as you turn. If you encounter grinding or resistance that feels wrong, stop immediately. Unscrew the cap completely and try again from the beginning.
Check your cap’s rubber gasket during reassembly. This ring sits between the cap and tank opening. Make sure it rests in its groove evenly. A twisted or displaced gasket prevents proper sealing. Once the gasket sits correctly, thread the cap on with gentle, steady pressure.
After fixing the seating and threading, test your humidifier without water first. Run it for a few minutes to confirm the valve holds. This simple check saves you from water damage. If dripping continues after these fixes, the problem likely involves the internal valve mechanism or a cracked tank chamber.
Common Mistakes That Cause Repeated Dripping
Many people make simple mistakes that cause their smart humidifier valve to drip repeatedly. Understanding these errors helps you avoid the problem altogether.
Failing to seal the tank lid tightly is the most common mistake. You must close the lid completely before placing the tank on the base. A loose lid allows water to escape around the threads. Even a slight gap creates dripping at the valve connection point.
Overfilling the misting chamber causes pressure buildup inside the tank. When water level exceeds the fill line, excess pressure forces water through the valve seal. Always fill to the marked line only. Check your user manual for the correct water level.
Cross threading the tank cap happens when you screw the lid on at an angle. This breaks the seal between the rubber gasket and tank opening. Thread the cap straight down slowly until it stops. Listen for the threads to align smoothly.
Ignoring spring valve function leads to repeated dripping. The spring inside the valve cap must snap back after you press it. If it sticks or moves slowly, the valve cannot seal properly. Test the spring by pressing it several times before reassembly.
Not checking the O ring condition is another frequent error. A worn or flattened O ring cannot create a watertight seal. Inspect this rubber ring during every maintenance session. Look for cracks, discoloration, or permanent indentations.
Placing the tank unevenly on the base prevents proper seating. Your humidifier must sit on a level surface. An angled tank creates gaps where water leaks through the valve. Always place your unit on flat ground before filling.
These mistakes repeat because people rush during setup and maintenance.
Preventing Future Leaks: Maintenance and Care Tips
Regular maintenance stops most dripping problems before they start. Your smart humidifier works best when you treat it with consistent care.
Check your O-rings monthly. These rubber rings wear out over time and lose their seal ability. Remove the tank cap and inspect the O-ring for cracks, flat spots, or discoloration. If it looks compressed or damaged, replace it with a new one. Even small damage lets water escape.
Clean your valve spring regularly. Mineral deposits from tap water build up on the spring mechanism and prevent it from snapping back properly. Soak the valve cap in a mixture of equal parts white vinegar and distilled water for 30 minutes every month. This removes mineral buildup and keeps the spring responsive.
Keep your unit level. Place your humidifier on a flat, stable surface. Uneven placement puts pressure on the tank seal and causes slow drips. Check the base with a level tool if you’re unsure.
Tighten the packing nut behind your valve handle every few months. This nut can loosen from vibration during normal operation. A quarter turn usually fixes it without over tightening.
Use distilled water only. Tap water contains minerals that accumulate inside your tank and damage seals. Distilled water prevents this buildup and extends your humidifier’s life.
Store your humidifier properly. When not in use, empty the tank completely and let it dry. Store it in a cool, dry place. This prevents mold growth and seal degradation.
These simple steps keep your valve working properly and eliminate most dripping issues before they become problems.
When to Replace the Valve or Water Tank Entirely
Sometimes your smart humidifier valve continues dripping even after you’ve tried basic fixes. This means you may need to replace either the valve or the entire water tank. Knowing when to take this step saves you time and frustration.
Replace the valve when basic repairs fail. If you’ve tightened the packing nut, cleaned the spring mechanism, and replaced the O-ring but dripping persists, the valve itself is damaged. Spring-loaded valves wear out after repeated use. The internal components lose their snap-back function over time. You can purchase a replacement valve that fits your humidifier model’s specifications.
Replace the water tank if you spot cracks. Inspect your tank carefully under good lighting. Look for hairline cracks along the bottom, sides, or around the cap opening. Even tiny cracks allow water to seep out slowly. Cracked tanks cannot be repaired effectively. Water will continue leaking no matter how many times you reseal it. A new tank solves this problem permanently.
Consider replacing both if the unit is old. Humidifiers that are five years or older often have multiple worn components. The valve, O-rings, and tank may all be deteriorating simultaneously. Replacing just one part might fix the dripping temporarily, but other failures will follow soon after.
Order replacement parts based on your model number. Check your humidifier’s manual or the base of the unit for the model identifier. Manufacturers sell replacement tanks and valves that match your specific device. Installing new parts takes only minutes.
If dripping returns within weeks after replacing components, your humidifier may have reached the end of its useful life. At that point, purchasing a new unit becomes more practical than continued repairs.
Final Thoughts
A dripping valve does not mean your humidifier is broken beyond repair. Most problems come from simple mechanical issues you can fix yourself.
Start with the basics. Check your O ring. Inspect the spring valve. Make sure the tank sits level on its base.
These small steps solve most dripping problems. You do not need special tools or technical skills to fix them.
Patience matters when fixing this issue. Press the spring valve several times to restore its snap back function. Give the O ring time to reseat properly after cleaning.
Rushing through repairs often causes the same problems to return. Take your time during each step.
Regular care prevents future leaks. Clean your filters monthly with a vinegar and water solution. Check seals and springs often. Use distilled water to protect internal parts from mineral buildup.
These habits keep your humidifier running smoothly for years. They also save you money on replacement parts.
Know when to call it quits on a part. If cracks appear in your tank, replacement is your only safe option. A cracked tank will always leak, no matter how many times you tighten it.
Trust your inspection results over hope. Sometimes a valve or tank has simply worn out.
Your smart humidifier works best when every part functions correctly. A small drip today can become a bigger problem tomorrow if you ignore it.
Fix the issue early. Follow the maintenance tips outlined above. Your humidifier will reward you with quiet, efficient operation and consistent moisture output for your home.
Frequently Asked Questions
Why is my smart humidifier dripping from the water tank valve?
A dripping valve usually means one of three things. First, your rubber O-ring may be worn out. This small ring creates a tight seal inside the valve. Second, the spring mechanism may be stuck. Mineral deposits from tap water build up on the spring and stop it from closing properly. Third, your packing nut could be loose. This nut sits behind the valve handle and holds everything in place.
How do I know if my tank is seated correctly?
Remove your water tank from the base and look at the connection point. The tank should sit flat and level on the base without rocking. Press down firmly until you hear a click or feel resistance. If the tank wobbles, it won’t seal properly. Check that the base itself is on a flat, stable surface too.
Can I fix a dripping valve myself without replacing parts?
Yes, you can try several quick fixes first. Tighten the packing nut behind your valve handle by turning it clockwise. Press the spring loaded valve on your tank cap repeatedly to restore its snap back function. Clean the valve spring with a vinegar and water solution (equal parts, 30 minute soak) to remove mineral buildup. These steps solve most dripping problems without buying new parts.
What should I inspect if the dripping continues?
Unplug your humidifier and remove the tank completely. Look for hairline cracks or visible damage on the tank surface under good lighting. Check if the tank cap threads properly onto the tank without cross threading. Inspect the rubber O-ring for cracks, hardening, or discoloration. These signs tell you whether you need replacement parts.

Hi, I’m Rue Hessel, the founder and voice behind TheGenTool. I’m a passionate tech enthusiast who loves exploring the latest gadgets, smart devices, and electronics that shape our everyday lives. Through my website, I share honest, hands-on reviews of trending Amazon products to help you make smarter and more confident buying decisions.